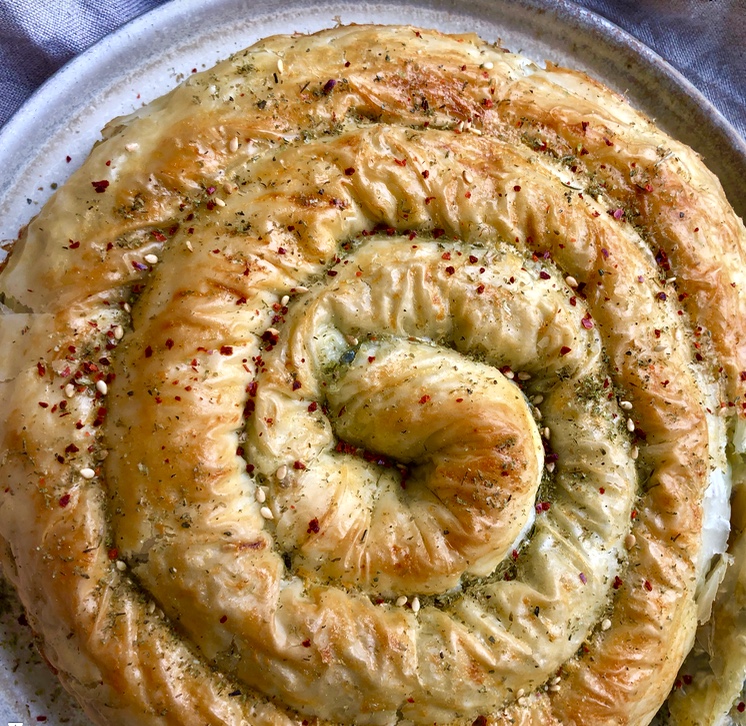
I seem to go through all or nothing phases with this website; a flurry of new content and then silence for a month. The fact I’m still sharing recipes after 12 years must count for something though, right? Just think of me now as a cantankerous old vending machine in need of a kick every now and then to get the Coke out.

I’m very into rice noodles (and soba, come to think of it) once the weather warms up. It’s gloomy today in London but the weather has generally settled into the sweet mid-20’s spot which is pretty much perfect as far as I’m concerned. You can keep your 30C+ until this city gets air-con.

I’ve always got the barbecue lit at this time of year, and we had a piece of really good onglet to put on it. Onglet wants to be cooked quickly and sliced thinly across the grain – this will leave you with just the right amount of chew. Sliced too thicky it can become a real jaw workout. The flavour is incredible, and it’s very inexpensive compared to the swaggering ribeye.

I made a dressing from a pounded scotch bonnet (hi, still me!), garlic, grapefruit juice, lime, honey and fish sauce – the kind of salty/sweet/sour/hot thing that gets me excited during the warmer months. Loads of crunchy veg and roughly torn herbs and you’ve got a pretty amazing dinner. This recipe serves four but we ate it between two followed by Double Caramel Magnums because we are greedy and not even the heat seems to affect my ferocious appetite.

Rice Noodles with Onglet, Grapefruit and Scotch Bonnet Recipe

(Serves 4, honestly)

It helps if you have everything ready before you cooking the onglet unless you are fast at prepping. So make the dressing and chop the veg while you are waiting for the barbecue to be ready.

1 large onglet steak, butterflied (you can ask the butcher to do this)
1 scotch bonnet pepper, deseeded and chopped roughly (this is a hot dressing so reduce to half a pepper if you want less heat)
2 cloves garlic, peeled
4 tablespoons grapefruit juice
3 tablespoons lime juice
3 tablespoons fish sauce
1 teaspoon honey
The flesh of 1 grapefruit, segmented
1/2 cucumber, thinly sliced
1/4 daikon, peeled, quartered and thinly sliced
2 spring onions, thinly sliced
4 leaves Chinese cabbage, frilly parts thinly sliced
170g flat rice noodles
White pepper, for seasoning the onglet (just use black if you like)

Prepare the barbecue for direct cooking.

Make the dressing by pounding the chilli and garlic to a paste in a pestle and mortar. Stir in the grapefruit and lime juices, fish sauce and honey. Taste and adjust until you have a good balance of hot/sour/salty/sweet – this depends on the sweetness of your fruit and heat of your chilli.

Once the barbecue is hot, season the onglet heavily with salt and less so with white pepper, then grill for 2-3 minutes each side. Set aside to rest for at least 10 minutes.

Cook the rice noodles by covering with boiling water and leaving for 6-8 minutes (or according to instructions on the packet).

Once the noodles are cooked, drain and mix with half the dressing. Slice the onglet very thinly and add to the noodles with the vegetables, grapefruit and herbs. Plate up and finish with the remaining dressing.

This recipe first appeared on the Great British Chefs website. 

Some condiments – ketchup being a prime example – are not worth the bother of making at home, while others improve on the original by 100%. Reader, it is stupendously good. I hadn’t realised before I made it that it’s a fermented product, which is odd. I’ve been making a lot of fermented hot sauces recently but this one is probably my favourite. I can’t stop eating it, particularly with eggs but to be honest, you could slosh it on anything and be very happy. It’s hot, sweet, funky and pungent with garlic. I like to danger-dare myself to eat ever-increasing quantities.

Home Made Sriracha Recipe

Makes approx 1 litre

600g red chillies, stalks removed
10 garlic cloves, peeled
4 teaspoons sea salt
4 tablespoons rice vinegar
2 tablespoons fish sauce
75g soft light brown sugar
75g caster sugar

Put the chillies, garlic, salt and sugar in a blender and whizz to a rough puree.

Pour into a sterilised jar or bowl and cover. Leave to ferment for 3 days, burping each day.

Blend again until very smooth. Add to a saucepan with the vinegar and fish sauce, bring to a simmer and simmer a few minutes, then pour into sterilised jars.

We wanted to preserve some of our huge bag of wild garlic for the coming months so we made wild garlic pesto (practically a law at the start of the season), wild garlic butter (brilliant with boiled eggs) and a batch of wild garlic kimchi. This recipe is one for those who enjoy a powerfully flavoured’ kimchi. It does not pull any punches but that’s the way we like it – even with eggs at breakfast time.

The second recipe uses purple carrots and lots of ginger to make a pink-purple kimchi which looks fantastic and has a lovely sweet, hot flavour. We’ve been eating these in sandwiches (try this kimchi and cheese toastie recipe), in kimchi and corn fritters, with fish and vegetable rice bowls and just on its own as a snack. I also love my mate Lizzie’s idea of using it in fried rice. So many possibilities!

Wild Garlic Kimchi Recipe

Fills a 2 litre Kilner jar 

1 Chinese cabbage, outer leaves removed and roughly chopped
1 mooli, peeled and grated
2 turnips, peeled and grated
50g of fine-grained salt
400g wild garlic thoroughly washed and roughly chopped
6 garlic cloves, peeled and left whole
¼ cup Korean chilli flakes (gochugaru)
1 tbsp white miso
1 tbsp rice flour

Massage the salt into the cabbage, mooli, turnip and wild garlic in a large bowl until they start to weep juice (this takes around a minute or so), then cover with cold water. Place a plate on top to keep the veg below the water and leave somewhere fairly cool (no need to refrigerate) for 24 hours.

After this time, give the veg a good rinse. In a blender, blitz the garlic cloves, Korean chilli flakes, miso and flour until you have a paste. Mix with the veg.

Pack it into a 2 litre sterilised Kilner jar, pushing down firmly. If there isn’t enough juice to cover the kimchi add some water, then seal. You can either leave the clip open and tie an elastic band around it tightly so that the lid is tied shut but has enough room for some gas to escape or take the danger route which is to seal it fully and remember to burp it every day or so. If you’re particularly worried about this you can also now buy self-burping jars.

The kimchi will start to ferment after 2-3 days and will be ready to eat in a week or so.

Purple Carrot and Ginger Kimchi Recipe

Fills a 2 litre Kilner jar 

1 Chinese cabbage, outer leaves removed and roughly chopped
6 purple carrots, peeled and finely sliced
1 mooli, peeled and finely sliced into strips
2 turnips, peeled and finely sliced
50g of fine-grained salt
20 cloves of garlic, peeled and left whole
3 inches ginger, peeled
½ cup Korean chilli flakes
4 tbsp rice koji (or 3tbsp white miso)
1 tbsp fish sauce

Massage the salt into the cabbage, carrots, mooli and turnip in a large bowl until they start to weep juice (this takes around a minute or so), then cover with cold water. Place a plate on top to keep the veg below the water and leave somewhere fairly cool (no need to refrigerate) for 24 hours.

After this time, give the veg a good rinse. In a blender, blitz the garlic cloves, ginger, Korean chilli flakes, koji (or miso) and fish sauce. Mix with the veg.

Pack it into a 2 litre sterilised Kilner jar, pushing down firmly. If there isn’t enough juice to cover the kimchi, add some water, then seal. You can either leave the clip open and tie an elastic band around it tightly so that the lid is tied shut but has enough room for some gas to escape or take the danger route which is to seal it fully and remember to burp it every day or so. If you’re particularly worried about this you can also now buy self-burping jars.

Those of you who follow me on Instagram will know I was in Belize in Central America a couple of weeks ago. I can’t write much about that trip now because it will all be published in a magazine later this year but I came back feeling very inspired by the food, and I wanted to create something which incorporated Caribbean ingredients. Longtime followers will know that the food of the Caribbean has always attracted me and I learnt lots in Belize, where the cuisine combines many culinary influences.

I’ve used achiote in this soup – an earthy flavouring made from ground annatto seeds, also popular as a colouring agent. I was already familiar with it as an ingredient in Mexican pork pibil recipes but using it to flavour soups and stews was new to me. I added it to a base of homemade fish stock with pierced scotch bonnet chilli and some cassava – a total revelation. To be honest, I’d always dismissed cassava as a boring starchy root but it has a really interesting nutty flavour and the texture of a very waxy potato.

I used cod cheeks because they’re really good value and hold their bouncy texture well in soup, and splashed out on some massive, meaty prawns. On the side, I made fry jacks, which are deep-fried dough dumplings served with pretty much anything in Belize – eggs, refried beans and cheese are all popular toppings. I’ve added wild garlic to mine, which brings me just about to the end of the bin bag of wild garlic I’ve been working through for the past week.

This is a stunner of a recipe (even if I do say so myself) with deep flavour from the fish stock but a lightness, too. The corn brings pops of sweetness and the scotch bonnet a background buzz of tropical heat. The jacks were a perfect accompaniment while still warm – crisp on the outside, fluffy and garlicky inside and ready to soak up that soup. Heaven.

Belizean Inspired Fish Soup with Wild Garlic Fry Jacks Recipe

Serves 4

For the fish stock

1kg fish heads and scraps
1.5 litres water
Small bunch parsley stalks
1 sprig thyme
1 large onion, peeled and roughly chopped
Large knob of butter

For the soup

600g cod cheeks
8 raw, shell-on king prawns (you could shell these if you want to make the eating easier but I like to get messy and suck the heads once cooked)
2 scotch bonnet chillies, pierced and left whole
300g cassava, peeled, woody core removed and diced
1 teaspoon achiote powder
Handful wild garlic leaves washed and sliced
2 corn cobs, kernels sliced off (or you could use a tin)
Handful coriander

For the fry jacks

250g plain flour
30g butter
2 teaspoons baking powder
1 teaspoon salt
50g wild garlic leaves washed and finely chopped
Oil for deep frying

First, make the fish stock. Melt the butter in a large saucepan and fry the onion for a few minutes. Add the fish heads and scraps and fry a few minutes longer. Add the water, herbs and a pinch of salt and bring to the boil, skimming off the scum. Reduce to a simmer and cook for 20 minutes, then strain. This is the base of your soup.

Make the dough for your fry jacks by mixing the flour, baking powder and salt in a large bowl. Add the butter and mix with your fingers until it resembles crumbs. Add the wild garlic and milk and mix to a dough. Knead 30 seconds until smooth, then separate into 8 balls.

Add the stock to a large saucepan. Mix a tablespoon or so of the stock with the achiote powder until you have a red paste. Add this back to the soup with the cassava chunks and allow to simmer while you make your fry jacks.

Heat a couple of inches of oil to 180C in a heavy cast iron skillet or another suitable pan. Roll each ball out into a circle on a lightly floured surface and cut each circle in half. Make a slit in the centre of each (see photo to see what I mean). Deep fry each piece for a couple of minutes, then carefully flip over. They’re ready when puffed and golden. Drain on kitchen paper.

Once the jacks are done, finish the soup by dropping in the corn, wild garlic, cod cheeks and prawns and cooking gently for 4-5 minutes. Season. Finish with the coriander and serve with the jacks.

I want to quickly share a recipe D cooked which made another dent in our bulging bin bag of wild garlic – a boned shoulder of lamb stuffed with the neverending leaves, crushed seaweed, lemon zest and pine nuts.

I’ve become more interested in cooking with seaweed since I wrote an article for Great British Food magazine about it recently. It adds a lovely umami seasoning to lamb in particular and this recipe is a stunner – soft roast meat with a powerful filling which works well with potatoes, flatbreads or a grain like bulgur wheat on the side.

Shoulder of Lamb Stuffed with Wild Garlic, Seaweed and Pine Nuts Recipe

1.8kg shoulder of lamb (or thereabouts) – this is the weight with bone-in. Ask your butcher to bone it so it will lay flat on a surface and be rolled up again once stuffed.

For the stuffing 

20g dried seaweed (we used wakame stems)
100g pine nuts
1 tablespoon sea salt flakes
1 tablespoon Urfa chilli flakes
Zest of 1 lemon
200g wild garlic washed and checked thoroughly for critters
2 tablespoons olive oil

Preheat the oven to 180C.

Pulse all the stuffing ingredients together in a blender until you have a rough paste.

Place the lamb skin side down and smear the filling liberally across the meat. Roll it and tie it up with string, for roasting. There are proper methods for tieing it but we just made it work.

Put the lamb into a roasting tray, rub the skin with a bit of olive oil then sprinkle liberally with salt and pepper.

Roast for one and a half hours or until it reaches an internal temperature of around 60C. If you want to crisp the skin further, finish under a hot grill for around 3-4 minutes (watching carefully).

We went foraging for wild garlic in London last weekend, stuffing two big bags with pungent green sprays. After sifting through for buds (now pickled), we found ourselves left with an entire binbag-full. It triggered flashbacks to the time we ended up with 34kg of spring onions.

So it’s wild garlic in everything. I’ve put it into my easy everyday flatbread recipe, smearing them with extra wild garlic butter while still warm from the skillet. D has made batches of wild garlic kimchi and wild garlic pesto, and we had wild garlic buttered soldiers with our eggs this morning (recommend). Yesterday I made the wild garlic and cheese börek recipe below, and I’m still staring down a half-full bag.

Here are the recipes for the wild garlic flatbreads and the börek – enjoy! You, too, could stink of garlic 24/7. Oh, and before you ask: I got the stuff in Mile End, not Camberwell. Sorry! I believe Dulwich Woods is full of it, though.

Wild Garlic Flatbread Recipe

Makes 8-12 depending on how large you want them.

500g strong white flour plus a little extra for dusting and mixing
2 teaspoons salt
30ml olive oil
300ml warm water
1 packet of instant yeast
150g wild garlic leaves, washed and chopped
Extra wild garlic blanched, chopped and mashed into butter is recommended for serving!

Mix everything together in a bowl and give it a knead on a lightly floured surface for a few minutes, until smooth and springy. You may need to add a little more than 500g flour (just a dusting), as the wild garlic adds moisture but just mix it together and see how you go. You want a nice, smooth, springy dough.

Leave the dough in a warm place for an hour or so until it has roughly doubled in size.

Knock back the dough and divide into 8 balls for larger breads or 12 for small.

Roll the dough balls flat and cook for 2-3 minutes in a properly hot, dry pan (I use a cast iron griddle) until a little charred on each side. They will start to puff up when ready. Keep them warm inside a clean tea towel while you cook the rest.

Wild Garlic and Cheese Börek Recipe

150g wild garlic leaves washed and chopped (don’t worry about them being *too* finely chopped as they will wilt and it’s nice to have some slightly larger bits I think)
200g white Turkish cheese (I bought ‘beyaz peynir’ which literally means ‘white cheese’ in the Turkish Food Centre but you could use feta if you don’t have a similar shop nearby)
1 packet yufka pastry (again I buy this in the Turkish Food Centre – you could use filo if you like but it will be a much crisper result as filo is thicker)
Around 100g butter, melted
1 egg, beaten
A sprinkle of za’atar and chilli to serve (optional)

Preheat the oven to 180C.

Mix the chopped wild garlic leaves well with the crumbled white cheese.

Have your melted butter ready, then lay out a double sheet of yufka on a work surface. Brush all over with butter. Lay another two sheets overlapping the edge on the right-hand side of the first sheets. Brush with butter. Repeat this four or 5 times (depends how much surface space you have, to be honest.

On the bottom edge of the sheets, make a long strip of the wild garlic and cheese mixture, as if you are making the largest spicy cigarette of your life. Carefully roll it up into a long sausage, brushing the edge at the top with a final layer of butter before sealing. Curl it around into a snail shape, then add to a cake tin, brushing again with butter (bit of a theme, the butter thing). Finally, give it a quick wash with the egg – this makes it nice and golden.

Bake for 35-40 minutes, or until golden brown. It tastes best when still slightly warm from the oven.

They’re called radiatori because they look like little radiators! I hope that pleases you as much as it does me. They’re also the perfect shape for grabbing onto a crumbly ‘sauce’ like this one, or a more traditional pesto. This smoosh of toasted walnuts, anchovies, breadcrumbs, garlic, parsley and lemon bound with olive oil makes a luxurious, wintry pasta sauce and also an excellent stuffing for fish on the BBQ – particularly mackerel.

I’ve served it on a swirl of fluffy ricotta (given a little more sharpness with natural yoghurt) so there’s a lovely hot-cold contrast going on and the cheese brings some creaminess. Serve with purple sprouting broccoli, chilli flakes and a flurry of Parmesan shavings for a pasta dish that will bust through any amount of miserable, drizzly weather.

Radiatori with Walnuts, Ricotta and Broccoli Recipe

Serves 2 very generously (i.e. greedily)

For the pesto

Makes enough for 6-8 servings of pasta (keep leftovers in a jar in the fridge, covered in olive oil)

200g walnuts, toasted in a dry pan
80g wholemeal breadcrumbs (or regular white crumbs)
4 cloves garlic
12 anchovy fillets
Handful parsley leaves
2-3 tablespoons lemon juice
Olive oil

To serve

300g radiatori (I bought mine in Sainsbury’s!)
Large handful purple sprouting broccoli
125g ricotta
Heaped tablespoon natural yoghurt
Parmesan
Chilli flakes

Make the pesto by blitzing the walnuts in a blender until finely chopped but stop before they turn to a powder/paste. Mix with the breadcrumbs. Bash the garlic and anchovies to a paste in a pestle and mortar and mix with the breadcrumbs, parsley and lemon juice. Add a slug of olive oil until you’ve got a pesto-ish mixture.

Cook the pasta until al dente, reserving a little pasta water. Cook the broccoli until al dente and drain – not long just a few minutes.

Gently whip the ricotta and yoghurt together and divide between two large bowls. When the pasta is cooked lob in as much ‘pesto’ as you like and stir with a little of the pasta water to loosen. Crumble extra ‘pesto’ on top. Serve on the ricotta with the broccoli, Parmesan and chilli flakes.


Duck and Endive Salad with Pickled Walnut Dressing Recipe

Serves 2

2 duck breasts (weighing around 230g each), skin scored lightly in a criss-cross pattern
250g stale sourdough bread, torn roughly into crouton-sized chunks
The cloves from a half a bulb of garlic, separated but unpeeled
Olive oil
2 pickled walnuts
1 tablespoon red wine vinegar
1 shallot, cut into fine rings
2 red chicory, leaves separated
4 large handfuls watercress


Preheat the oven to 180C.

Place the sourdough chunks into a roasting tray and add the garlic, 3 tablespoons of olive oil and some salt and pepper. Mix well and cook for around 25 minutes, turning once, or until golden and crisp.

Place the shallot rings into a bowl of iced water.

Make the dressing by smooshing 3 cloves of the now-roasted garlic with a pinch of salt, the pickled walnuts, 2 tablespoons of extra virgin olive oil and 1 tablespoon good red wine vinegar. Shake in a jar to emulsify (or use your preferred method).

Season the skin of the duck breasts and place them in a cold cast iron skillet or other heavy based pan. Turn the heat on low-medium and let them slowly heat up for 5 minutes or so. Turn the heat up to medium and cook for another 5 minutes then turn over and cook for a few minutes more. Cooking time will depend on the exact size and heat but this should give you crisp golden skin and pink flesh. Allow to rest for 5 minutes.

Mix the salad leaves with some of the dressing and the croutons and arrange on two plates. Arrange the duck slices and some of the shallot rings on top, then drizzle with a little more dressing and sprinkle with crunchy salt. You may feel like adding a further dribble of olive oil – I did.

Burnt leeks are having a moment. We’re now barbecuing this ‘boring’ and familiar vegetable in the style of the Catalonian calçot. Leek and potato soup? Forget it, pal.

While the outside is completely charred the insides collapse into buttery softness and you could finish them with lots of different toppings. A Spanish romesco sauce would still be lovely or some grated hard-boiled egg. Maybe bottarga? Crunchy breadcrumbs fried in the oil from a tin of anchovies would be pleasing or spiced butter, hollandaise, a tahini dressing, miso…

The warm yoghurt sauce is not as weird as it sounds because its creamy sharpness plays off the sweet leeks. I dotted it with some whizzed chipotles in adobo which I made for a hot sauce commission – that fires the whole thing off in a Mexican direction, particularly once garnished with oregano.

We’re coming into grilling season now and I suggest you get involved with grilled leeks because it couldn’t be easier: put them on the grill and take them off when they look f*cked. Simple.

Burnt Leeks with Warm Yoghurt Sauce and Chipotle Recipe

4 leeks
1 egg, lightly beaten
250g full-fat natural yoghurt
1 clove garlic, crushed
50ml hot water (hot from the tap)
2 chipotles in adobo – available online ready-made or I have a recipe for chipotle in adobo on the site here
Olive oil
Fresh oregano

Heat a barbecue for direct cooking.

When the flames have died down and the coals are covered in a thin layer of grey ash, place the leeks on the grill. Cook for around 10 minutes or so, turning until completely black and charred all over.

Mix together the yoghurt, egg and garlic in a bowl. Slowly whisk in the hot water. Transfer the mixture to a saucepan and simmer gently over medium heat for around 5 minutes. Season.

Whizz the chipotles with a glug of olive oil to make a dressing.

When the leeks are ready, split them down their length and add the warm yoghurt sauce, chipotle dressing and oregano. Lovely served with this fresh flatbread recipe.

I’d been thinking about clams for days. Shells clacking as they’re tossed through steaming pasta, starchy water dripping through the late February sunlight. Their sweet meat is like tiny treats to slurp from exploded hinges as saline juices mingle with the honk of garlic and fermented depth of miso.

We made this riff on spaghetti alle vongole into a Friday lunchtime treat, threading tangles of crisp, salty agretti (monk’s beard) through the dish to bring freshness and colour. This Italian coastal plant is very popular on London menus at the moment and I couldn’t resist buying a bunch in Peckham’s General Store. It’s not the kind of vegetable I’ll buy often (too expensive) but the thought of it playing with the white miso and clams was too much for this hopeless ingredient spod to resist.

We ate it with a half bottle of chilled rosé hanging about in the fridge and plenty of bread to squidge into the clammy juices leftover. It felt as good as a holiday.

Spaghetti with Agretti, Clams and White Miso Recipe

Serves 2

250g spaghetti
250g clams (I didn’t weigh them tbh but just grab a nice big load of clams from a fishmonger, a couple of handfuls per dish if you like)
4 cloves garlic, crushed
2 teaspoons chilli flakes
1 heaped tablespoon white miso, mixed with a little of the pasta cooking water until dissolved
A large knob butter (don’t be shy, use about 25g)
200g agretti
Splash of white wine

Put the pasta on to cook in plenty of boiling, salted water.

Melt the butter in a large, lidded frying pan. Add the crushed garlic and chilli flakes and cook out for a minute or so, stirring. Add the miso and wine and let that bubble down.

Add a large ladleful of pasta water and let it bubble down and emulsify with the butter.

Add the clams and agretti, then turn up the heat to medium/high and add another splash of pasta water. Put a lid on and let them steam for around 4 minutes, or until all the clams have opened up.

Remove the pasta from the water using a claw and slosh it into the sauce pan. Toss aggressively. Serve immediately with good bread for those juices.

I have accelerated rapidly from ‘just adding sprouts to a few dishes in small quantities’ through to ‘adding them to everything including those I promised I wouldn’t’. A pal pointed out I’d once lamented the overuse of these mini cabbages saying – and this is a direct quote – ‘God help us but it’s only a matter of time before someone dishes up a sprout Caesar’.

A sprout Caesar is the last recipe I posted on this website.

So yes, fine, I have given in to the sprouts because I feel like they’re just so much more interesting now I’m shredding them, which is ridiculous because I’ve been doing this for years. I’m adding them to fried rice, coleslaw, gözleme, CAESAR SALAD and now dumplings in lieu of cabbage, with pork.

Potstickers are one of my favourite carbs and… oh ok all carbs are my favourite carbs. Look, potstickers are easy to make if you don’t bother with the fancy pleating – tip: they will taste the same unpleated – and they freeze well which means you can always have an arsenal of hangover-smashing pork cushions on hand.

I’m going to try making my own dumpling wrappers next time because the frozen ones tend to get brittle around the edges which makes them a bit harder to seal. Other than that, it’s very simple. You will probably have filling leftover and I suggest you fry it and eat it on top of rice for a quick and satisfying lunch the next day.

Pork and Brussels Sprout Pot Stickers Recipe

This is quite a basic recipe which you can add to for e.g. some rehydrated dried mushrooms such as shitake would boost the umami or you could change the sprouts for the more traditional cabbage, add some minced prawns and so on.

2 packets frozen dumpling wrappers, available from Asian supermarkets (each pack had 16 in it I think) – defrosted!
75g sprouts, shredded
8 Chinese garlic chives (or a few spring onions), finely chopped
150g fatty minced pork (the fat is really important otherwise the dumplings will be dry)
2 tablespoons light soy
1.5 teaspoons sesame oil
1 tablespoon ginger, grated or finely chopped
2 cloves garlic, grated or crushed
1/2 teaspoon white pepper
1 teaspoon sugar
2 teaspoons salt
2 tablespoons oil, for frying
Spring onions, for garnish
1 teaspoon cornflour mixed with a couple of tablespoons of water, for sealing the dumplings

Serve with a dipping sauce made from 3 tablespoons dark soy, 2 tablespoons black vinegar, a teaspoon sesame oil and a little diced ginger and chilli – or whatever you prefer! Often I add chilli oil.

Plunge the shredded sprouts into a pan of boiling water and when they come back to the boil, drain and refresh under cold water. Dry thoroughly.

Mix the pork with the sprouts, chives (or spring onions), light soy, sesame oil, ginger, garlic, white pepper, sugar and salt. You can cook a small piece at this point if you want to check the seasoning.

Take a dumpling wrapper (keep the open packet underneath a damp tea towel to prevent them drying out) and place a teaspoon of filling into the middle. Wet the edge of the dumpling wrapper with the cornflour and water mix) and then bring up the edges. Use your middle finger to push one edge of the wrapper and make a pleat, closing with your opposite thumb (this is much easier than it sounds when you have a go at it). Repeat to make as many pleats as you like, then do the same on the other side. If you don’t want to pleat the dumplings, just press the edges together. I just remembered my mate Lizzie has a video on her blog!

Repeat with all the wrappers. Press the finished dumpling down onto a lightly floured surface to give it a flat bottom, then repeat until all the filling is used up. To cook, heat a lidded frying pan (preferably with a heavy base) over medium heat and add 1 tablespoon of oil, brushing to distribute evenly. Arrange the dumplings in a circle until the pan is full and fry for a couple of minutes until the bottoms have browned. Carefully splash in a couple of tablespoons of water – it will spit and hiss furiously, so put the lid on. Steam the dumplings for around 3 minutes, adding another splash of water if it runs dry. Check the dumplings are nicely browned on the bottom. Serve the dumplings with the dipping sauce.

I first came across hasselback potatoes on American food blogs, years ago now. Thing is, it’s actually a Scandinavian recipe named after the restaurant Hasselbacken in Stockholm where they were invented (I’d always thought it was something to do with their backs being all ‘hassled’ by cuts*). The keys to their success are firstly the cutting and roasting technique and secondly, the application of a serious amount of butter.

With creamy innards and lots of crisp edges on top, this recipe delivers pretty much everything you want from potatoes in one package. Like many cooks, I season mine heavily and slip garlic in between the slices but it’s fun to go a step further occasionally – here I’ve topped them with crumbled Stilton, bacon and chives.

It occurred to me that these would make fantastic party food so I’m sharing the recipe. It’s simple, almost impossibly delicious and looks festive to boot. Job done mate.

*Not really LOL.

Hasselback Potatoes with Garlic, Stilton and Bacon Recipe

12 King Edward potatoes
7 cloves garlic
50g butter
3 tablespoons olive oil
5 rashers back bacon
Chives
Stilton

Preheat the oven to 200C.

Cut slices 2mm apart 3/4 of the way through each potato.

Melt the butter with the olive oil. Place the potatoes in a roasting dish and push slices of garlic into the slits, making sure they are pushed right in, or they will burn. Pour the butter and oil mixture over the potatoes and add 100ml water to the dish. Turn the potatoes over to make sure they’re well coated. Season heavily with salt and pepper.

Bake for 1 hour 30 minutes, basting with butter every 10 to 15 minutes, or until they’re tender inside and golden and crisp on top. Don’t skip the basting.

During this time, grill or fry the bacon until very crisp, then chop finely. I then re-crisped mine in a pan.

Once cooked, serve sprinkled with the bacon bits, crumbles of blue cheese and snipped chives. You can also serve drizzled with more butter from the pan. Why not?