Mummified Chicken

I found ‘A Tale of 12 Kitchens’ in Peckham Library. It was on my radar because the man who wrote it, artist Jake Tilson, is local, and the book has a section on Peckham. One of the recipes was this ‘mummified chicken’ – apparently so named by the author’s wife but Middle Eastern in origin and properly called ‘firakh mashwiya bi-al-summa’. You get your chook, smother it with a paste of blended onions and tart, lemony sumac and then stuff it inside a load of flatbread.

In the book, Jake suggests using Lebanese lavash flatbread, but when I went down to Persepolis in search of something suitable, Sally told me that Jake also buys his bread there and always uses this circular khobez, so I followed suit (we’re all tight in Peckham, you see). The bread splits apart very easily and has just enough room, handily, to hold a chicken. I stuffed it inside a double layer and then put a further two on in the opposite direction to make sure the bird was nice and cosy.

The whole thing is baked for 3-4 hours (depending on size) and although you are left with very crisp, inedible bread on top, the underneath is gooey with roasted chicken juices. We actually squabbled over the last few pieces of super savoury, unctuous, saturated khobez. The bird itself was incredibly succulent and flavoursome, having steamed and sizzled in its little enclosure. Jake suggests serving it with rice but a green salad worked perfectly well for us.

This dish would make excellent dinner party fodder. It’s really easy, you can leave it in the oven for ages and it has a ‘big reveal’ when you crack open the shell and the fragrant meaty steam puffs out. Just make sure you’ve got good mates round, because you will be fighting over those bread scraps, trust me.

Mummified Chicken or Firakh Mashwiya Bi-al-summa

(from ‘A Tale of 12 Kitchens’ by Jake Tilson)

2 large onions, grated
2 tablespoons sumac
1 tablespoon olive oil
salt and pepper
4 khobez breads or other suitable flatbreads
1 large chicken

Preheat your oven to 175C/Gas 4

Make a coarse paste with the onions, sumac, oil, salt and pepper and cover the chicken with it, inside and out. Grease a baking dish. Stuff your chicken inside your bread and put it in the dish, adding more bread as necessary until it is completely enclosed. You just have to do your best here. Cover it loosely with foil and bake for 3-4 hours, depending on the size of your chicken. You need to brush the top of the bread with water every now and then to stop it burning. It does go very crisp on top. Serve with pilau rice and/or salad.

Adipoli Parathas

The tava is still my favourite new toy. For a while, I didn’t even put it away but just let it sit on the worktop so I could look at it more, like a new pair of shoes that you just can’t put in the cupboard. I started basic with chapatis and then felt ready to move on to parathas. It was supposed to be a gentle learning curve until I spotted this gorgeous stuffed version; it had to be done.

This is from the brilliant ‘Indian’ by Das Sreedharan; hopefully I won’t get into trouble for publishing another of his recipes. I can’t understand why the book isn’t more popular to be honest. I found mine for a stupidly low price and quite a few others have told me how they found it in a bargain bin. Das is from Kerala and it’s packed full of South Indian recipes; coconut, curry leaves and mustard seeds are predominant flavours throughout.

Apparently, this recipe is based on “the popular Ceylonese tradition of flat, thin bread dough stuffed with…seafood masala.” You make the paratha dough (wholemeal flour and oil) and then slap it on the hot tava before smearing with the mix of  prawns, egg, onion, chilli and spices. This cooks briefly and then you flip so that the coating sears and sizzles instantly on the tava. You flip again and then roll it all up.

They are dangerously moreish. Crisp paratha and soft, spiced stuffing, fragrant with the essential curry leaf; every now and then a succulent prawn. It’s really tempting to re-make and pack ’em to bursting but this is one of those times to resist – knowing when to stop and all that. They look weird while you’re cooking them (a bit like someone sicked up on a paratha – there’s no denying it), but once rolled, we’re talking high quality stuffed carb here – we ate four each in one sitting and yearned for more.

I suggest you make a steaming great heap of them. There’s nothing else for it. You won’t need any accompaniments except perhaps something to dunk them into – they’re a meal in themselves.

Adipoli Parathas (from Indian by Das Sreedharan)
(makes eight)

225g wholemeal flour
4 tablespoons vegetable oil, plus extra for brushing

For the filling

8 tablespoons vegetable oil
1/2 teaspoon mustard seeds
2.5 cm piece ginger, peeled and grated
2 onions, peeled and finely chopped
1 green chilli, chopped
10 curry leaves
1/2 teaspoon turmeric
150g raw prawns, peeled
2 eggs, beaten (I used 3)
salt

To make the paratha dough, put the flour in a bowl and gradually stir in the oil and about 150ml water to make a soft, pliable dough. Knead for 3-4 minutes, then return to the bowl, cover and set aside for an hour.

To make the filling, heat the oil in a frying pan. Add the mustard seeds and when the start to pop, add the ginger, onions, chilli and curry leaves. Cook over medium to low heat for 5 minutes, stirring every now and then until soft. Add turmeric and salt and cook for 1 minute then add the prawns until pink and cooked through. Remove the mix from the pan and set aside.

Divide the dough into 8 equal portions. Roll one into a ball before rolling out into a circle as thinly as possible. It should be paper thin and about 8-9 inches in diameter.

Heat a tava, griddle or frying pan and brush with oil. When hot, slap on a circle of dough (the heat should be medium). Cook until it starts to turn golden. Stir the eggs into the prawn mix, lower the heat and then spread 3 scant tablespoons onto the paratha. Leave until the egg is pretty much cooked and then flip, searing the mix onto the paratha. Wait until it is stuck well on there before you flip again and cook briefly. You want it nicely golden underneath.

You now just roll it up. I kept mine warm in a very low oven while I made the rest. I served them cut into two or three pieces each with a yoghurty dipping sauce which had some coriander, chilli and lemon juice stirred through (I think). A dusting of chilli powder on the parathas is really good.


Garlic Curry

I now laugh in the face of normal quantities of garlic. Since chicken with 40 cloves I consider myself a hardcore garlic eater. I’m sure you can smell my breath from wherever you are. This recipe contains a whopping 3 whole bulbs and on top of that 3 whole onions, which is a lot of allium considering there’s not much else bulking out this curry save a couple of tomatoes, chillies and spices.

The recipe comes from a book called ‘Indian’ by Das Sreedharan. In it, Das describes how people, “wonder how the garlic is so well tamed by the spicy and tangy tamarind sauce” and it is, but still…wow. Eating this curry is a little bit like being slapped in the face with a spicy lemon, I imagine. At first you pucker up with all that tamarind and then the double heat of red and green chilli kicks in before you cautiously lift a now yellow clove to your lips and bite down on a still crisp and still strong, whole clove of garlic. Then another and another. I really got into munching them down but it definitely felt a bit weird.

Chapattis

I served it will a coconut-heavy vegetable number and we scooped up the lot with my first attempt at chapatis using my new tava. I need to practice getting the shape more uniform but otherwise they were pretty fine and I even managed to get them to puff up a little bit.

I am of the opinion that no curry meal is complete without some sort of raita or other yoghurt based accompaniment and my favourite now is this cucumber pachadi, a recipe from one of my Flickr contacts, which you can find here. It is unusual (to me, at least) in that diced cucumber is first gently simmered with ginger so it is lightly cooked and then cooled and mixed with the yoghurt and a coconut, chilli and mustard seed paste. A temper of coconut oil, dried red chilli and curry leaves is poured on top. I served this to friends recently and they literally squabbled over the bowl.

One more thing about that garlic curry – I would suggest leaving it overnight before serving if you can bear it. Most curries are better the next day but with this the garlic and tamarind really get busy with each other overnight, melding into something just that little bit softer. You still won’t need to worry about vampires though; I was sweating that shiz for a week.

Garlic Curry (from ‘Indian’ by Das Sreedharan)
Serves 4

75g tamarind pulp (from a block)
3 tablespoons vegetable oil
200g garlic cloves, peeled (yep)
1 teaspoon fenugreek seeds
1/2 teaspoon fennel seeds
10 curry leaves
3 onions, peeled and finely chopped
3 green chillies, slit lengthways
1/2 teaspoon chilli powder
1/2 teaspoon turmeric
2 tomatoes, finely chopped

Put tamarind pulp in a bowl with 900ml hot water, breaking the pulp up as much as possible. Allow it to soak for 20-30 minutes before straining the water into a bowl through a sieve, pressing down on the pulp to extract as much as possible.

Heat 1 tablespoon of the oil in a pan and add 50g of the garlic, 1/2 teaspoon of the fenugreek seeds and the dried chillies and fry for 1 minute. Remove and drain oon kitchen paper. Transfer to a blender and process to a fine paste.

Heat the remaining oil in a large pan then add the fennel and remaining fenugreek seeds and cook for 1 minute or until they are golden brown. Add the onions, curry leaves and chillies and cook on medium heat for 5 minutes or until the onions are soft and then add the turmeric and chilli powder, followed by the chopped tomatoes. Mix well and cook for 5 minutes, stirring often.

Add the remaining garlic cloves, the garlic paste from the blender and the tamarind liquid. Cook on a low heat, stirring often for 15 minutes or until the mixture is thick and the garlic well cooked. I actually cooked this for about 15 minutes longer and the garlic was still crisp.

Chapatis (from Madhur Jaffrey’s Curry Bible)

Mix 125g chappati flour (or equal mix of white and wholemeal flours) with about 120ml water and a pinch of salt (my addition, chapatis don’t usually have any) to make a soft dough. Knead well for 10 minutes then shape into a ball and put aside in a bowl with a damp cloth over the top for at least 15 minutes. You can also chill for future use.

When ready to cook, set your tava or heavy based frying pan over a medium high heat while you knead the dough again and divide into six balls. Dust your surface with flour and roll out into a circle about 13cms in diameter. Pick up the chapatti and slap it in your hands to get rid of extra flour then slap it on the tava. Cook for ten seconds then flip it. Cook for another 10 seconds then flip again and using a damp cloth, dab it all over then flip it again – this should make it puff up.

Repeat with the remaining balls of dough. Apparently you can do the puffing up bit just by putting it in the microwave.

Chorizo Stuffed Squid

Is it time to get the BBQ out yet? Is it is it is it? No?

As much as I enjoy the odd winter BBQ, the novelty is starting to wear off. I want to feel the sun beating down on my back and the fierce heat of the grill on my face, knowing that within arms reach is the sweet salvation of an ice cold beer. I look forward to the British summer with the same fierce optimism every year; this time it’s going to be a corker, trust me.

Stuffed squid are perfect for the BBQ but in the meantime we’re OK because they also taste great cooked indoors.

Two points to remember with stuffed squids – firstly, make sure they are medium sized, not great hulking monsters and secondly, don’t overstuff. As we all know you either cook squid very fast or long and slow; you don’t want them too big or else the squid will be done before the stuffing is warmed through. They also shrink a bit as they cook so don’t pack them denser than a gap year students’ rucksack, or they’ll burst.

Chorizo Stuffing


Apart from that it’s child’s play. I’ve made these with cooking chorizo and the cured kind and both are delicious, although I think I prefer cured, as it holds its shape giving you something to really bite down on, each paprika stained nugget exploding with flavour. Ask me tomorrow and I might prefer the alternative.  A sharp, lemon dressed salad is the perfect accompaniment and if it’s summer and you’re living the dream, so is an ice cold beer.

Chorizo Stuffed Squid

The amount of stuffing you use of course depends on the size of your squid. I used two medium sized squids. Make sure they are well cleaned before you begin. If you use fresh squid then make sure to keep those tentacles for an extra treat.

I used about 150g cooked (and cooled) rice mixed with 250g chopped, cured chorizo sausage, 1 small softened onion and a large handful of finely chopped parsley leaves. I seasoned this with black pepper and stuffed inside the squid, securing with cocktail sticks.Make 3-4 deep slashes in the flesh of the squid – this will help the heat to get all the way through.

When ready to cook the squid, oil them on the outside then season with salt and pepper. You can either grill them on the BBQ – about 4-5 minutes or pan fry them or griddle them indoors. Check they are hot all the way through using a skewer and serve with a lemon scented salad.


Chimichurri

When a girl gets gifted with a hefty hunk o’ prime cattle, her thoughts immediately turn to entertaining; a lengthy weekend lunch with mates was on the cards. Picture this: nearest and dearest gathered on sofas with a glass and a smile; the soothing rhythm of contented chatter drifting through the kitchen; me pondering whether or not to give the beef another 10 minutes resting. I imagine myself emerging from the kitchen carrying the magnificent centrepiece to a chorus of ‘oohs’ and ‘aahs’ and pairs of eyes gleaming with excitement. I’ll be as proud as punch as I set her down on the table and…

…pooff! That was the sound of my dream going up in smoke. We still don’t have a proper dining table and it’s breaking my heart. Our only stand-in is a dainty set of patio furniture which only sits two and well, it’s garden furniture. That only really feels right if you are either a student or it’s Christmas and you need to squeeze in a couple more relatives. So anyway that’s my excuse for two of us eating a piece of meat that could probably serve ten. I’m sticking to it.

I began by cutting off two fat sirloins for Sunday lunch. A ballsy chimichurri filled the craving for something with the invigorating prickle of salsa verde without actually being just that; I seriously need to overcome my addiction to the green mistress. Parsley is still a main contender here, whizzed with a lorra lorra garlic and spiky chilli flakes. A fine way to commence a week of bovine feasting. It’s a tough job, eating all that lovely meat, but someone’s got to do it.

Chimichurri

30g parsley leaves (a large handful)
2tsp hot chilli flakes or to taste
2 tbsp red wine vinegar
1 tbsp lime juice
1 shallot
Olive oil, to loosen
4 cloves garlic
Salt
A sprig of fresh oregano, leaves removed (optional)

Either chop the garlic, parsley, oregano and shallot very fine or whizz in a food processor. Mix in the chilli flakes, vinegar, lime juice and loosen with olive oil to reach your desired consistency. Season with salt. Great with grilled meats and fish.

Ragu Papardelle

Few things wrap themselves around pasta quite like the ragu. Three and a half hours of gentle simmering and that meat is ready to embrace every fold, nook and cranny of carbohydrate. You wait a long time for it to collapse, reduce and intensify and so a generous portion is essential as a reward. When you’ve finished devouring, it is perfectly possible that you may need a lie down and then, probably, a nap.


I managed to stick out three and a half hours cooking this ragu. At one point I thought it might need four, and in my delicate mental state owing purely to the anguish of delayed gratification I almost shed a little tear. I’m sure none of you lot would be so fragile and unreasonable in the face of a half cooked stew though, so don’t let that put you off.

Ragu


While the persona of the ragu is like that of a mature and erudite gentleman, the gremolata zips in with the energy of a three year old given free reign with the sherbet dip dabs. The chipper mix of lemon zest, parsley and garlic is, for me, the perfect condiment, skipping around those wintry depths with perky high notes.

This is solid Sunday food. It’s indulgent, comforting and takes a long time to cook. It also gives you time to get into character with it; I pretended I was Keith Floyd in his heyday as I poured an entire bottle of gutsy red over some large pieces of meat and then settled down with a glass of my own.

Beef Ragu Papardelle with Gremolata

800g beef shin
2 large carrots, finely diced
2 large sticks celery, lightly peeled and finely diced
2 onions, finely diced
2 bay leaves, slightly torn
1 tin good quality chopped tomatoes
1 bottle red wine (not crap)
2 large cloves garlic, very finely chopped
A large sprig of thyme, leaves only
Pasta, to serve

For the gremolata

Handful parsley leaves, very finely chopped
2 cloves garlic, very finely chopped
Zest of 2 unwaxed lemons, finely chopped or grated (if you can only get waxed lemons, give them a good scrub under a hot tap)

Add some olive oil to a large, heavy based pan and add the onions, celery, carrots, bay leaves and garlic and sweat gently, with the lid on, for 10-15 minutes until they softened. Season the beef shin well all over and add it, plus everything else. Bring to the boil then turn down very low, put the lid on and simmer gently for 3-4 hours, until the sauce is thick and the meat is falling off the bone. Remove all the pieces of bone and discard. Flake up the meat if it hasn’t done so by itself and add back to the sauce. Adjust the seasoning and serve mixed through pasta of your choice (papardelle is good as it is quite big and robust).

For the gremolata, just mix everything together and sprinkle over your pasta.

The Best Chicken Sandwich

…FACT.

I was more excited about this sandwich than I was about the dish that made it happen – chicken with 40 cloves of garlic. That’s the kind of tunnel vision you find yourself dealing with when you’re a sandwich obsessive; always focused on where the next fix is coming from. It wasn’t just the leftover chicken that got me thinking so much as all that remaining oil – 200ml of the stuff. It struck me that this precious garlic, herb and chicken infused oil would make possibly the best garlicky mayonnaise I’d ever tasted. It did.

I’ve never mixed mayonnaise so carefully, such was the strength of my opinion that this oil was the most exquisite leftover to pass my way in a very long time. The result was a wobbly pot of  yellow goo which had ‘stick me in your face or stick your face in me right now’ written all over it. I mixed it with chunks of the leftover white and dark chicken meat and of course, lots of crispy skin bits.

It was time for The Build. This starts with the best bread you can find – I chose a classic white bloomer from the German bakery Luca’s in East Dulwich. It ain’t cheap but the bread is worth it; dense crumb, real flavour, perfect crust. Chicken-mayo mix heaps generously on one side of the sandwich and I smeared a few of those sweet roasted cloves onto the other.

With richness of course must come balance and the bitter leaves of a curly endive mixed with lemon juice and generous amounts of salt and pepper did the job perfectly.

All that could be heard for a full five minutes was chewing, interspersed by me spluttering, “best…chomp chomp…chicken…chomp…sandwich” – pieces of stray endive dropping on to my top and blobs of mayonnaise on my chin. It wasn’t pretty; I was out of control. Such is the power of a good sandwich.

My Ultimate Chicken Sandwich

First, you need to improve your quality of life considerably by treating yourself to this dish. Then you’re set to take the highway straight to leftover heaven central.

First, make your mayo. Put two large egg yolks in a clean bowl and whisk them together. Begin adding the oil a few drops at a time, whisking as you do so and making sure each bit of oil is fully incorporated before adding the next. As you whisk more oil in and the mayo starts to thicken, you can start adding the oil in slightly larger quantities until you are steadily adding it in a thin stream. The key with mayo is to be cautious with the oil until you get a feel for making it. If you add too much at once, it will split. If this happens, don’t despair. Take a fresh egg yolk in a clean bowl and begin adding the split mixture into it, very slowly, just as if it were the oil. This should bring it back.

Stop when the mayo reaches the desired thickness. Add lemon juice and seasoning to taste.

(This, by the way, is why I didn’t use extra fruity olive oil when I made my chicken, as the flavour would have been too strong for the mayo. The leftover oil is also great for roasting vegetables – particularly broccoli, and in salad dressings).

Mix the mayo with your leftover meat and heap onto one piece of bread. Spread some leftover garlic cloves on the other piece. Add some curly endive or other bitter salad leaves mixed with a generous amount of lemon juice and seasoning. Sandwich together. Eat and forget your troubles ever existed.

Chicken with 40 Cloves of Garlic

I’ll admit from the off that I was slightly scared. Not by the quantity of garlic you understand – it mellows considerably with roasting – but by the oil; 250ml of olive oil settled into a deep golden pool in the bottom of my battle-scarred roasting dish.

This dish comes from Provence, land of olive oil and garlic. A full forty cloves stew gently in the fruity elixir, and by the time the chicken is cooked, they are transformed to a soft savoury paste which can be squidged from its papery home and smeared onto the chicken, or good bread, or into mashed potato. A sprig or two of thyme and a couple of bay leaves add their own perfume and the whole heady medley gets right into that chicken – and your soft furnishings – beautifully. Febreeze, eat your heart out.

If you are thinking of making this dish – and I cannot encourage you enough to do so – then this article and this one, are definitely worth a read. There are a few controversial points to consider, such as whether to peel or not to peel when it comes to the garlic (don’t) and whether or not one should brown the chicken before roasting. I just turn the heat up at the end of cooking to crisp up the skin.

When it comes to resting, I recommend positioning her with her legs (mine spectacularly yellow, from corn feeding) sticking up in the air. This means that all the juices seep down towards the breast, leaving you with juicy meat. To serve, most recommend mashed potato but I just didn’t fancy it in the face of all that richness and made a salad of bitter curly endive dressed liberally with a lemony dressing. Juices were mopped with hunks of good bread.

The leftover oil has been a source of much excitement over the past couple of days. I can’t wait to tell you what I did with the leftovers. The carcass went into the stock pot too so that one decent chicken has been the base for three meals each for two people. It’s the gift that just keeps on giving.

Chicken with 40 Cloves of Garlic

1 chicken (mine was 1.5kg)
250ml olive oil
40 cloves of garlic or thereabouts (that’s four whole bulbs), papery bits removed but not peeled
A sprig of thyme (plus a bit extra for the cavity)
A sprig of rosemary (I didn’t use this, but it can’t be a bad thing)
2 bay leaves
Half a lemon
Salt and pepper and lots of it

Preheat the oven to 180C

Un-truss the chicken drizzle a little oil over the skin, rubbing it in. Surround it with the garlic cloves, herbs and bay, then stick the other herbs and lemon inside the cavity. Pour the oil around. Season the chicken very generously, then cover with foil and seal tightly.

Roast it for 1 hour then remove from the oven and turn the oven up to 220C.  Carefully pour out the oil into a dish (along with the garlic) then set aside and return the chicken to the tray. Roast for a further 10 minutes then rest in a bowl with legs in the air for 15.

Use this time to make a sharply dressed salad and cut some fresh bread for spreading those garlic cloves onto. Enjoy!

Chicken Pie for Lurpak

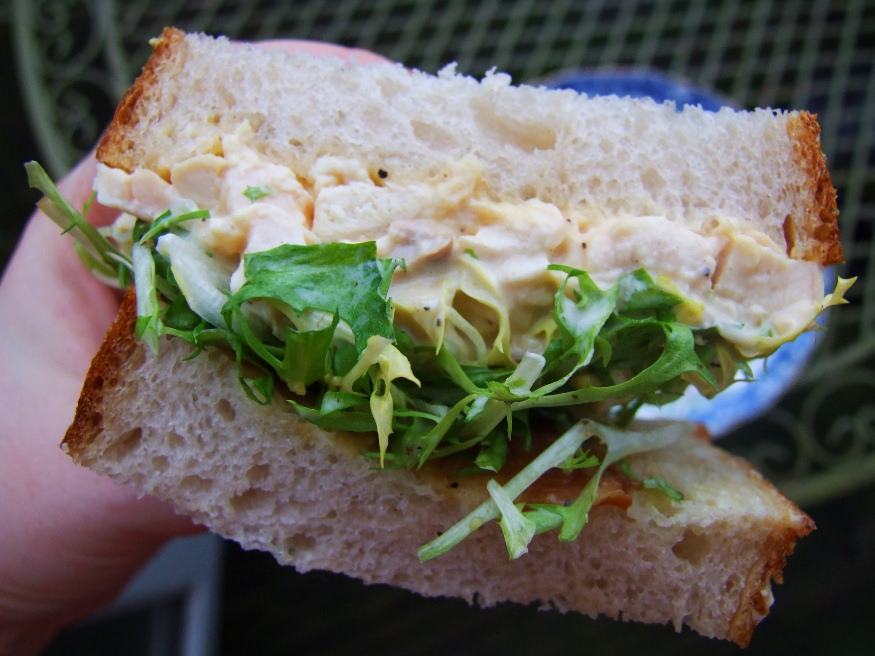
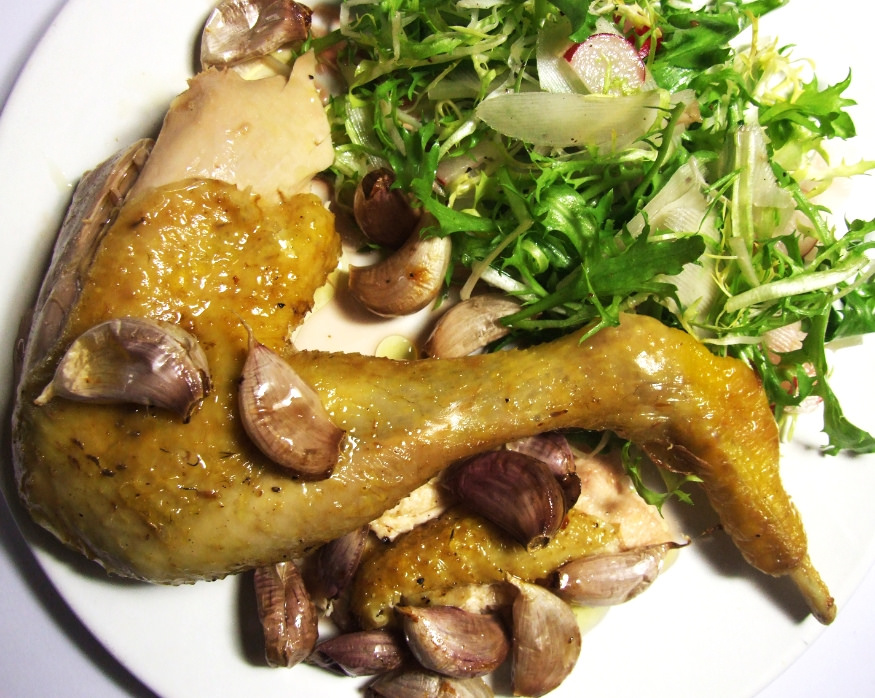
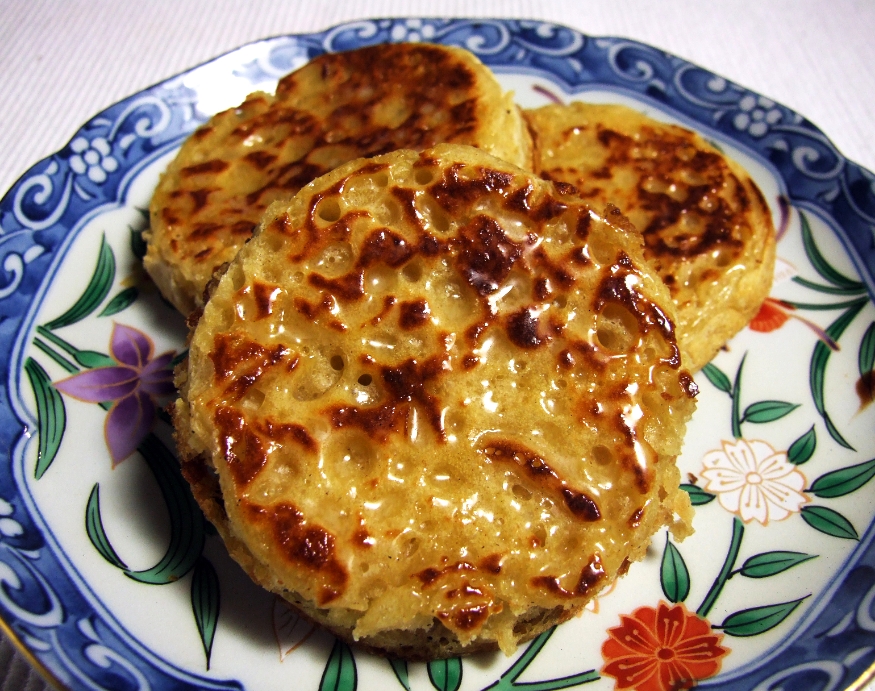
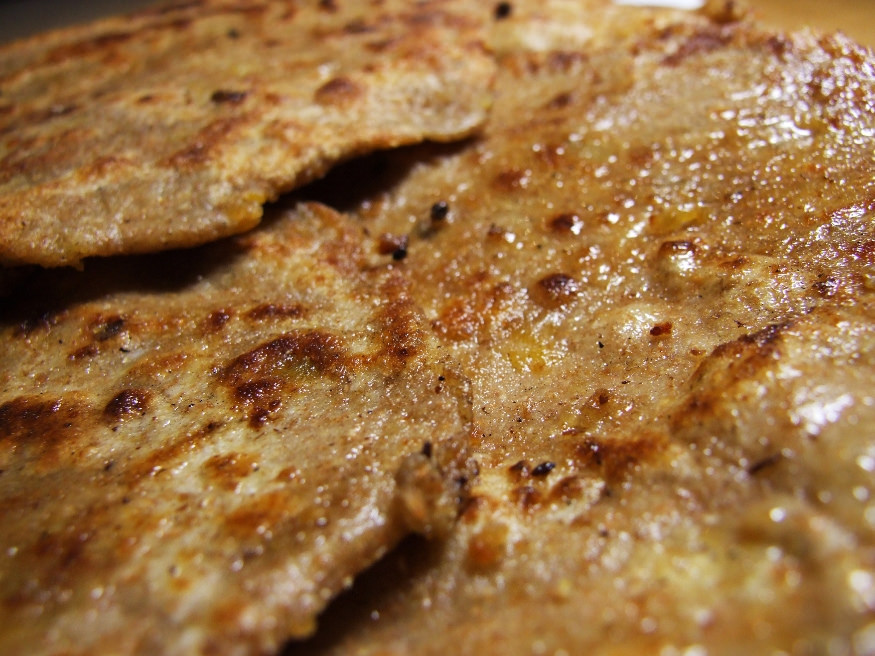
I have been asked many times to name the ingredient I cannot live without. The answer has always been the same: butter. Fat makes things taste good and we all know it. Crumpets oozing with butter that dribbles down your chin; a roast chicken smothered and crisped and dipped in the pan juices; a fresh hot paratha smeared generously with ghee. You get the idea.

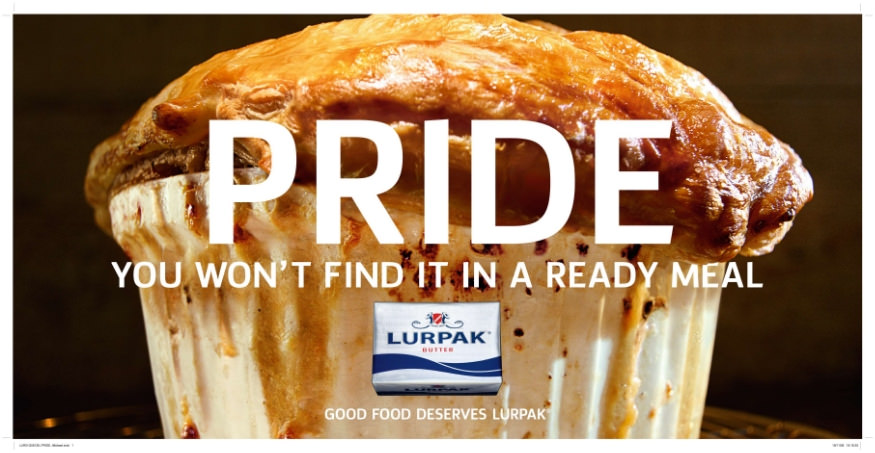
I get approached a lot by people wanting me to help them promote things –  e-mails ping into the inbox with the opening line, “I think this may be of interest to your readers.” This one was different though. For a start they actually wanted me to go and cook something which, you know, I’m quite keen on doing and secondly, well, I really love butter don’t I. Would I come and make a pie for the new Lurpak ad campaign? Damn right I would.

And so I found myself at a studio in Shoreditch one sunny afternoon cooking up a chicken and fennel pie. There was also a home economist there who, thankfully, was very entertaining. I usually can’t stand sharing a kitchen with anyone. We made two pies, just to make sure that they could capture ‘the shot’. The idea was to make the pie look as ‘epic’ as possible. It had to be a beast – a tall, proud, epic beast. This was where the home economist came in, employed as she is to make food look ‘right’ for ads and mags and books etc.

Photographing the Pie

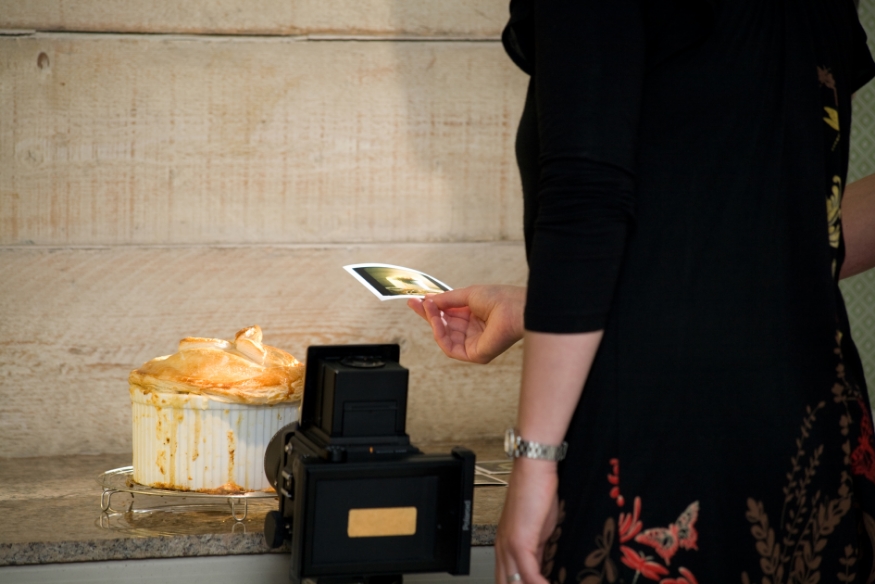
The result was a shiny domed beauty; a steaming, puffy, bubbling pot of meat and pastry. I wanted to eat it but of course, couldn’t. It was whisked away to be lit and snapped and lit and snapped again. It was a whole new world to me, this advertising business. The main thing I learned is that there is a huge amount of hanging around. All in all though, a fun day and an experience I’d definitely repeat. They also asked me to come in for a casting for the TV ad, but sadly I couldn’t make the date, being as I was on my way to Lisbon.

In the end, that perfect shot was achieved and it was time for me to go home and for Jeanne to start baking her cupcakes. The ad campaign is featured on billboards around the country – I’ve already seen it in Old Street and last night spotted one on my own turf in Peckham! It’s rather nice to see my little pie all big and out there on its own in the city, doing its best to encourage people to cook and use more butter. Now that’s a message I can really get behind.

Chicken and Fennel Pie

(fills an 18-20cm pie dish)

1 free-range chicken, cooked (I used a roast chicken but you could use cooked chicken pieces if you don’t want to roast one).
2 bulbs fennel, tops, bottoms and core removed and finely sliced
1/2 large onion, sliced
4 rasher smoked bacon, diced
1 large leek, sliced
3 cloves garlic, crushed
1 small handful of chopped parsley
Splash of white wine
A dollop of wholegrain mustard (optional)
Oil, for cooking

350 – 400ml bechamel or white sauce (bought or home made)

For the pastry

The pastry is puff but I prefer shortcrust so here’s my recipe. Just use whichever you prefer.

100g Lurpak, at room temperature
220g plain flour (not strong white bread flour)
A large pinch of salt
1 egg, beaten

Prepare the pastry by sieving the flour and salt into a large bowl. Cut the softened butter into cubes and add it to the bowl. Using a knife, start cutting the butter into the flour until it is fairly well mixed. You can now use your hands to start rubbing the butter into the flour – do this as lightly as possible. If you try to squidge the butter between your fingers too much the pastry will become tough. When it resembles fine crumbs, get some cold water (the colder the better) and add a tablespoon at a time, cutting it in with the knife each time, until it starts to come together. When it starts to form large lumps, use your hands to bring it together into a ball. It should leave the bowl clean. Rest in the fridge for 30 minutes.

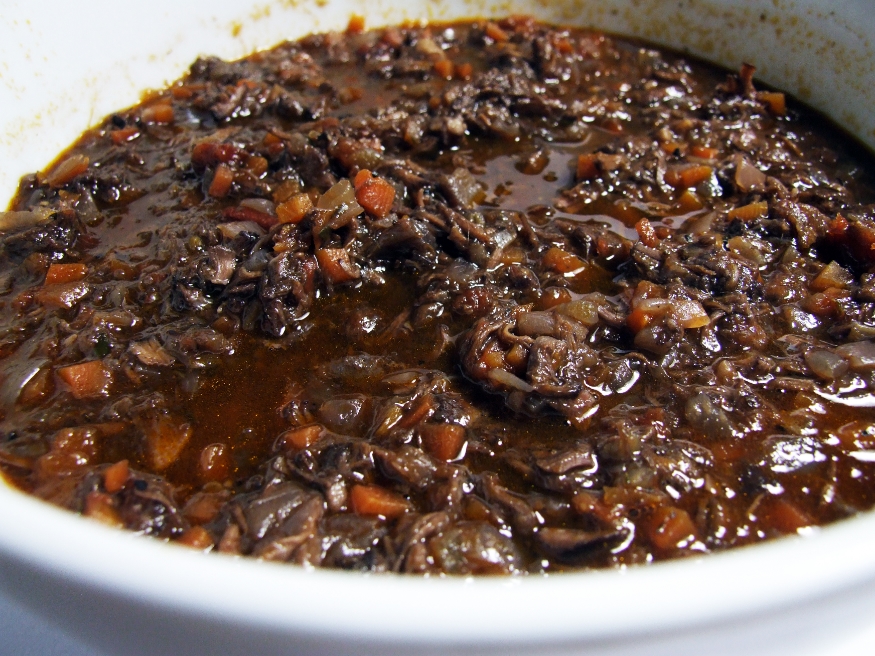
Heat a splash of olive oil in a pan and add the bacon to it. Once the bacon is cooked add the leeks, garlic, fennel and onion (plus the wine if using) and cook on a very low heat with the lid on for around 15 minutes.

Preheat your oven to 200C.

To assemble the pie divide the pastry into two portions – one portion should be two thirds of the total amount and this will be the base and sides of the pie. The remaining pastry will form the lid. Roll out the base pastry into a circle shape on a lightly floured surface. The shape will need to be larger than your dish as it needs to form the sides of the pie also. Carefully lower this into the dish. Roll out the lid and set aside.

Mix the chicken, fennel mixture, mustard (if using), parsley and bechamel together. Take care when adding the bechamel. Add a little at a time to get an idea of how much you will need. Season the mixture with salt and pepper then fill the pie and top with the lid. You want the lid to overlap the sides of the pie dish. Crimp it down to make sure it is sealed. Cut a cross in the top with a knife and brush with the beaten egg.

Bake for 20-30 minutes at 200C until golden brown.

The other bloggers involved were Jeanne, who made these cupcakes and Mary-Rose, who made a roast chicken.

The photos above are used with the kind permission of Wieden and Kennedy and thanks to the whole team who were nothing but a pleasure to work with.

Crumpets

Me and crumpets have got history. My first attempt was a complete failure; the batter was wrong, the cooking was wrong, the finished product was wronger than wrong. I ended up with a pile of stodgy, under cooked discs, which lacked that most distinguishing and important of crumpet features – holes. If they don’t have holes then the butter can’t get in. Enough said.

My second attempt was more promising, mostly down to the good advice of Bea, who suggested I use a different recipe and make a couple of tweaks. The batter this time was spectacularly gaseous and I was effervescent with excitement. The bubbles in the batter rise to the top during cooking and burst, leaving that essential network of butter channels. I thought I’d nailed it. Well, I thought Bea had nailed it.

They did produce some holes – an improvement on the first attempt, but still not good enough. Bea was flummoxed and I was inconsolable until some helpful soul ventured to ask the rather personal question, “how old is your bicarbonate of soda?” I hung my head in shame and squeaked out the admission: “don’t really know; at least two years, probably three, maybe four.”

That was back in July. Despite being certain that this embarrassing discovery marked the end of my crumpet woes, I just couldn’t face making them again until now. The thought of a third failure too traumatic perhaps? Well, it almost happened again; I forgot to put the bicarb in. I honestly couldn’t believe what was happening, but through the mist of disappointment and dizzying fog of frustration I just slung it in half an hour late, re-mixed, re-covered and hoped for the best.

And…it worked. Hallelujah! They were spongy and light, with more holes than an OJ Simpson alibi. Finally, a recipe for crumps that I can rely on, and of course I’ve learned a thing or two about making them along the way. Here it is:

1. Using rings is a right faff. You have to oil them repeatedly (until you can’t be bothered any more) and lift them up using tongs while simultaneously trying to release the crumpet with a knife. Next time I’ll freestyle.

2. Making crumpets takes time. If you try and rush them (by turning up the heat) they will burn on the bottom before they are cooked on top.

3. Keeping bicarbonate of soda for longer than two years is skanky and pointless.

4. I’ve made every single mistake in the book so you don’t have to.

Crumpets

This mix makes about 14 crumpets. Just think, if you remember to put your bicarb in at the right time, your crumps could have even more holes than mine! (Edit: Miss Marmite Lover has made a brilliant suggestion in the comments: she adds more bicarb than the recipe suggests. Obvious now I think about it. This is a brilliant way to get more holes).

360g plain flour
2 teaspoons active dry yeast
580ml warm milk
1.5 teaspoons salt
1 teaspoon sugar
1 teaspoon bicarbonate of soda

Combine the yeast and sugar with 250ml of the warm milk in a bowl. Do make sure the milk is just warm, not hot. Cover and leave in a warm place to rest for about 10 minutes until frothy.

Sift the flour, salt and bicarbonate of soda into another bowl then make a well in the centre and add the yeasty mix along with the rest of the warm milk. Mix this to a thick batter using a wooden spoon. Cover it with cling film and allow to rest in a warm place for about an hour. The film will rise up as gases build up inside. This is good. The result is an extremely light and aerated batter.

Heat a wide pan over a medium heat then turn down fairly low. Use a piece of kitchen paper to wipe vegetable or groundnut oil over the base so it is coated in a nice film. Do the same to your rings if using or you can freestyle (i.e drop blobs of batter into the pan). Allow to cook for about 8 minutes or so or until they appear ‘dry’ on top, then flip them over to toast lightly for a minute on the other side. Remove to a wire rack to cool. Repeat as necessary. They can then be re-heated under a grill to crisp up more before serving. Spread liberally with butter and then rejoice in their holey juiciness.

A huge thank you once again to Bea. Without your advice I may never have lifted myself from the depths of crumpy despair.

Dhal Stuffed Parathas

I finally got around to making Gastrogeek’s aubergine dhal after months of bleating on about it. The addition of smoky burnt aubergine flesh is simply inspired and the dish lived up to expectations even after the long build up. With a lot left over though, I wanted to try experimenting with stuffed parathas, which would also solve the problem of not having any bread left to scoop everything up with.

Most recipes instructed to make a dough first, then roll each piece out, spoon a blob of cold dhal in the centre and then pinch it around and seal as if making a dumpling. The ball is then pressed down and rolled out, thus incorporating the lentils. I suppose you could call that ‘stuffed’ – the dhal was certainly stuffed inside the dough at one point, but the rolling basically just mushed the whole lot together.

This method does not make things easy when it comes to rolling. Despite liberal flouring, it was hard not to end up in a big, sticky mess as the lentils burst forth from the dough with alarming force, taking no taming whatsoever no matter how gently I rolled and flipped and turned. There had to be an easier way.

It made sense to me to try mixing equal amounts of flour and dhal at the very beginning, so the curry becomes the water that holds the dough together. Since they are not really ‘stuffed’ anyway then what would it matter? I made another batch and it worked well; I added just a drop of water to bring it together completely and the result was a much more workable dough that rolled out to a neater, thinner paratha. I didn’t fold the dough over though, so they weren’t as flaky as a regular paratha. Next time, next time.

I cooked them in a cast iron skillet in a little oil, brushing each with an indecent amount of ghee. We scooped up mouthfuls of leftover rogan josh, pumpkin and coconut curry and one of my favourite chutneys: walnut and mint. The recipe comes from Madhur Jaffrey’s ‘Curry Bible’ and is well worth a try. You just stick walnuts, mint, garlic, chillies and lemon juice in the blender, then mix with seasoned plain yoghurt. The result is rather hot with a tangy kick from the yoghurt and it has that immensely satisfying texture of blended walnuts, just like that of muhammara.

I’m not exactly the world’s most skilful paratha maker, but I did manage to produce some buttery, toasty, curry scooper-uppers, which had a pleasing sour and smoky kick and a bit of texture variation from the lentils. A welcome addition to the leftovers repertoire and one well worth the extra couple of pounds in weight gained due to my inability to control myself around clarified butter.

Dhal ‘Stuffed’ Parathas

This isn’t the most authentic recipe you’re going to come across but it is easy, so do what you will.

Equal amounts of dhal (cold) and chapatti flour. If you can’t find chapatti flour then use a 50/50 mix of wholemeal and white flour.
A pinch of salt
Ghee, for brushing
Oil, for frying (I used groundnut)

Mix the dahl and flour together with your hands and then add a drop of water if needed to bring it together. Knead it on a lightly floured surface until the dough becomes smooth (apart from the lentils, obviously). Then cover and leave to rest for about 10 minutes.

Divide into balls roughly the size of a small lemon and roll out to 10-15cm wide circles. You basically want to get them nice and thin. You can then try folding the parathas like I forgot to do, in half and half again before re-rolling. This should give you some nice flaky layers. I imagine this might be harder with the stuffed ones however, as the lentils make the dough a bit lumpier.

Heat a heavy pan until very hot (I used a cast iron skillet), then fry each in a little oil (about 1tsp) on both sides until brown blistered patches appear. Brush liberally with ghee once cooked and set aside on a warm plate while you finish the batch.

Madhur Jaffrey’s Walnut and Mint Chutney (from The Curry Bible)

60g walnuts
30g mint leaves
1 clove garlic
1 tablespoon lemon juice
4 tablespoons plain yoghurt
4 birds eye chillies (I used 2 larger green ones)
1/2 teaspoon salt

Whizz the walnuts, garlic, mint, chillies, lemon juice, salt and 5 tablespoons water in a blender until you have a smooth paste. Using a fork, whip the yoghurt in a separate bowl until light and fluffy. Mix the paste from the blender into this. Taste and adjust the balance of seasonings as necessary.

Steak Tartare

And so the year ended with one final meaty fling in the form of a birthday meal for my boyfriend. One last colon-clogging protein punch before our bodies gave in to cravings for nothing but fish, vegetables and miso soup. I expect you could hear my arteries begging me to stop from wherever you were at the time. Or maybe I really wanted to do fish but it was the 29th of December and all the fishermen were at home toasting their toes by an open fire, spending time with their families and generally having a life rather than braving the stormy seas catching fishies for my convenience.

Anyway. The fluster of festivities left me utterly unprepared and before I knew it I found myself in front of the butcher wondering, ‘what would Simon do?’ Simon Hopkinson that is. In my hour of need I turned to my king of British cooking. The pages of his ‘Week In Week Out‘, are so indelibly etched into my memory, that as I cast my eyes over the pieces of meat in front of me, I could hear him sagely whisper, “page 148,  Helen – surely you remember?” At once a stunning vision materialised: red nuggets of beef glistening against the silvery blade of a cleaver.

I used 125g lean sirloin per person (more flavour than fillet), and spiked the fine dice with whatever choice of seasonings took my fancy; chopped capers, cornichons, shallot, parsley, anchovies, Worcestershire sauce and mustard are all strong contenders. An egg yolk is essential for me, adding silky richness. Traditionally the tartare  is heaped onto toasted rye (I didn’t have any) or alongside a pile of frites (didn’t fancy making them) but thinly sliced baguette did the job just fine.

There is a curious excitement about eating entirely raw meat; it feels a little bit naughty – risky, even. Soft nuggets of melty beef are roused to life by piquancy and heat; as much as you dare. The key is not to tip the balance too far. Restraint, as always, is key.

For the main course, fish was obviously out and there was no doubt in my mind that serving a vegetarian course to the boyfriend on his birthday would be nothing short of highly offensive. I roasted a couple of partridges and served them with Simon’s bread sauce and game crumbs; bread crumbs crisped in the partridge roasting juices. Followed by cheese with beetroot chutney and a dark chocolate fudge cake, you could say it was the perfect end to a seasonal binge, and the perfect pre-cursor to a detox. To be  honest though, I’ve never really been into all that dieting malarkey and anyway, I have a feeling it might offend Simon.

Steak Tartare

Simon advises using 125g of either fillet, lean sirloin or rump. I used sirloin in place of fillet as it has so much more flavour. Chill it well then remove any fat and dice very finely, before placing in a well chilled bowl. You can now add your choice of seasonings, or if you are serving it at a dinner party or the like, just set things out on the table and let people add their own. As I said, parsley, capers, cornichons, Worcestershire sauce, mustard, anchovies, shallots and black pepper are all worthy additions. An egg yolk on top is essential in my opinion. Clearly not a dish suitable for the pregnant or vulnerable.