We went foraging for wild garlic in London last weekend, stuffing two big bags with pungent green sprays. After sifting through for buds (now pickled), we found ourselves left with an entire binbag-full. It triggered flashbacks to the time we ended up with 34kg of spring onions.

So it’s wild garlic in everything. I’ve put it into my easy everyday flatbread recipe, smearing them with extra wild garlic butter while still warm from the skillet. D has made batches of wild garlic kimchi and wild garlic pesto, and we had wild garlic buttered soldiers with our eggs this morning (recommend). Yesterday I made the wild garlic and cheese börek recipe below, and I’m still staring down a half-full bag.

Here are the recipes for the wild garlic flatbreads and the börek – enjoy! You, too, could stink of garlic 24/7. Oh, and before you ask: I got the stuff in Mile End, not Camberwell. Sorry! I believe Dulwich Woods is full of it, though.

Wild Garlic Flatbread Recipe

Makes 8-12 depending on how large you want them.

500g strong white flour plus a little extra for dusting and mixing
2 teaspoons salt
30ml olive oil
300ml warm water
1 packet of instant yeast
150g wild garlic leaves, washed and chopped
Extra wild garlic chopped and mashed into butter is recommended for serving!

Mix everything together in a bowl and give it a knead on a lightly floured surface for a few minutes, until smooth and springy. You may need to add a little more than 500g flour (just a dusting), as the wild garlic adds moisture but just mix it together and see how you go. You want a nice, smooth, springy dough.

Leave the dough in a warm place for an hour or so until it has roughly doubled in size.

Knock back the dough and divide into 8 balls for larger breads or 12 for small.

Roll the dough balls flat and cook for 2-3 minutes in a properly hot, dry pan (I use a cast iron griddle) until a little charred on each side. They will start to puff up when ready. Keep them warm inside a clean tea towel while you cook the rest.

Wild Garlic and Cheese Börek Recipe

150g wild garlic leaves washed and chopped (don’t worry about them being *too* finely chopped as they will wilt and it’s nice to have some slightly larger bits I think)
200g white Turkish cheese (I bought ‘beyaz peynir’ which literally means ‘white cheese’ in the Turkish Food Centre but you could use feta if you don’t have a similar shop nearby)
1 packet yufka pastry (again I buy this in the Turkish Food Centre – you could use filo if you like but it will be a much crisper result as filo is thicker)
Around 100g butter, melted
1 egg, beaten
A sprinkle of za’atar and chilli to serve (optional)

Preheat the oven to 180C.

Mix the chopped wild garlic leaves well with the crumbled white cheese.

Have your melted butter ready, then lay out a double sheet of yufka on a work surface. Brush all over with butter. Lay another two sheets overlapping the edge on the right-hand side of the first sheets. Brush with butter. Repeat this four or 5 times (depends how much surface space you have, to be honest.

On the bottom edge of the sheets, make a long strip of the wild garlic and cheese mixture, as if you are making the largest spicy cigarette of your life. Carefully roll it up into a long sausage, brushing the edge at the top with a final layer of butter before sealing. Curl it around into a snail shape, then add to a cake tin, brushing again with butter (bit of a theme, the butter thing). Finally, give it a quick wash with the egg – this makes it nice and golden.

Bake for 35-40 minutes, or until golden brown. It tastes best when still slightly warm from the oven.


Here’s a recipe for flatbreads that go with so many things – way beyond hummus and other dips. They would be good with grilled meats, for example, or even a curry. They’re perfect to have on hand for a barbecue, and they cook well on the grill too.

Easy Everyday Spiced Flatbreads Recipe (makes 8-12 flatbreads, depending on how large you want them)

You can make loads of variations on these using herbs like rosemary, for example, or mixing up the spices. Of course, you can also leave the spices out altogether.

500g strong white flour
2 teaspoons salt
30ml olive oil
300ml warm water
1 packet of instant yeast (7g or about 1.5 teaspoons)

Mix everything together in a bowl and give it a knead for a few minutes, until smooth and springy.

Leave the dough in a warm place for an hour or so until it has roughly doubled in size.

Knock back the dough and divide into 8 balls for large breads or 12 for small.

Roll the dough balls flat and then cook for 1-2 minutes in a properly hot, dry pan – seriously, you need to preheat it for 5 minutes at least. I use a cast iron griddle pan. Cook them until they’re a little charred on each side. They will start to puff up when ready.

It’s that time of year again folks: people are going bonkers for wild garlic. Us Londoners are making fools of ourselves scouring the tiniest patches of woodland, picking through sodden newspapers and train tickets, or having fivers wrestled out of our hands at farmers’ markets. Those of you in the sticks are laughing your jolly, garlic-scented heads off while tapping out pitying tweets about having a patch the size of a rugby pitch at the bottom of the garden. What is ‘garden’?

I’ve often wondered why wild garlic is so appealing. It’s not like we can’t get the same flavour – more or less – from standard issue, widely available garlic bulbs. I think it’s the colour, the greenness, the signal that this, finally, is spring. This year more than ever we need to grab fistfuls of pungent leaves and blend them into soups and pesto. We need to feel healthy and refreshed while still being comforted by that deeply satisfying flavour. That familiar allium honk.

Wild garlic comes before asparagus, broad beans and peas and it’s like a viridescent balm for chapped lips, windburned cheeks and pale skin. Plus, putting wild garlic in something instantly makes it more impressive, amirite? Take boring old soda bread – the least challenging of any loaf and so straightforward a child can make it (I imagine) – lob a load of leaves in there and now you have New Bread, Exciting Bread. It’s warm from the oven, ready to daub with butter and eat like no one is watching. Maybe no one is watching in which case, let yourself go. Several slices must be consumed before considering other ingredients. Once you get to that point, this is perfect with scrambled eggs and smoked salmon. I really recommend adding the dill, too, if you’re into it.

Wild Garlic Soda Bread Recipe

As a little side note, a mate said to me, ‘I think soda bread always tastes slightly fishy’ and I agree. Is this the bicarb? Who knows. It’s not unpleasant but it is definitely there. All the better for topping with smoked salmon, eh. 

300g strong white bread flour
200g whole grain (seed and grain) flour
400g whole live yoghurt
Large pinch salt
2 teaspoons bicarbonate of soda
A large handful of wild garlic leaves washed and roughly chopped

Preheat your oven to 180C

Mix all the ingredients together until they form a shaggy dough. Knead for about 30 seconds, then form into a round shape on a baking tray. Cut a cross in the centre about 2/3rds of the way deep.

Place in the oven for 40-45 minutes – when it’s done it will sound hollow when you tap the base of the loaf. Allow to cool a little before slicing, otherwise the middle of the loaf will be sticky.

Gozleme with sprouts and cheese

Remember when I told you about my love for sprouts? If it were up to me, they’d be having their moment. Recently, they’ve had to put up with avocados hogging the attention, then kale, and worst of all, their own bloody leaves in the form of ‘sprout tops’. Now, ‘flower sprouts’ have swaggered onto the scene, a cross between regular sprouts and kale. Like mini cabbages, but with a lot more frilly appeal, these hybrid imposters are stealing the show with their flouncy showmanship and seductive purple hue. They’ve all the sweetness of regular Brussels, but none of the bitterness, which they leave for my tightly furled friends, once again left lonely on the shelf.

Personally, I enjoy the sulphuric bite of a sprout and the general lack of interest has only encouraged me to use them more. At dinner recently I got into a conversation about gözleme and from that moment I glazed over and allowed my mind to wander down paths verged with finely shredded Brussels, the sky above filled with clouds of melted cheese.

Gözleme is a delicious carb-heavy component of Turkish cuisine, of which there are many. Borek, pide, lahmacun, manti et al – I love them all. The hardest part of making these is rolling the dough thin enough, and you will need one of those skinny rolling pins, which you can buy in Turkish shops or online. It needs to be so thin it’s almost see through, but it’s not as hard as you think, nowhere near as hard as these snail borek, which made me feel completely incompetent. Sure, my finished gözleme were a bit scruffy, but hot and shiny from the pan, spotted umber and filled with greens and cheese they were a perfectly dangerous snack.

I used a weird white cheese which I bought in a Russian deli but I would suggest you avoid doing that, and instead use something salty and crumbly like Feta, or Tulum. What I must insist upon however, is the use of sprouts. Good, old fashioned, dependable sprouts.

Gozleme with Brussels Sprouts and Cheese Recipe

Gözleme with Brussels Sprouts and White Cheese Recipe

This recipe makes 4 gözleme, which you’ll easily eat between 2 people. 

250g self-raising flour
220g full fat natural yoghurt (not Greek style)
Large pinch salt
Oil, for frying
Around 6 sprouts, finely shredded
3 spring onions, finely chopped
200g white cheese, such as Feta

Put the yoghurt in a bowl and beat it until smooth. Add the flour and salt and mix together – it will come together into a ball. Cover with clingfilm and rest for 15 minutes.

Blanch the shredded sprouts for 30 seconds in boiling water, drain and refresh under cold water.

Divide the mixture into four pieces and roll out each on a floured surface, until very thin. I went for a sort of oval shape, but you can do an oblong, whatever. You’ll be topping half of the dough and folding it over, basically. The dough can be sticky so don’t be shy with the flour.

Scatter half of the dough with sprouts, spring onions and feta. Fold over and either seal by pressing with the tines of a fork or curl up to conceal the raggedy edges, as I did.

Heat a tablespoon or so of oil in a pan and cook the gozleme over a medium-high heat until cooked and spotted toasty brown. Flip and repeat. Serve cut into pieces. Watch out, they’re hot.

The word za’atar means ‘thyme’ in Arabic, and I generally find that shop-bought blends are way too heavy on the herb for my taste; too many dusty green flecks, mixed with some sesame seeds and not enough sumac. This recipe contains poky Turkish chilli, and rose petals, which apart from adding a bit of Turkish delight fancy, also look the bomb. Salt is important too; proper, pyramid-crystallised sea salt and plenty of it.

Za’atar Recipe

150g toasted sesame seeds
20g sea salt
30g sumac
30g red chilli flakes
30g dried thyme
15g dried oregano
1 tsp ras el hanout
1/2 teaspoon rose petals

Toast the sesame seeds either spread out on a baking tray in a low oven or in a dry pan. They will darken slightly in colour and smell all, well, toasted. Keep an eye on them. Allow them to cool and then mix with all the other ingredients.

If you’re not intrigued by the title ‘mummified cockerel’ then we’re not going to get along, basically. First up, did you even realise cockerels were for eating? Me neither. I thought they were just for strutting about and waking people up with what is, frankly, one of the funniest animal noises ever. When I used to spend a lot of time out in the sticks, the noise of a cockerel never failed to make me giggle, even at 5am; they just sound so ridiculous and desperate.

I spent 15 minutes laughing at videos of cockerels crowing on youtube while writing this post, and that’s before I’d even started referring to the cockerel I cooked as ‘the cock’. So many jokes… ‘I cooked a cock today’. ‘I’m just mummifying a cock’. ‘Anyone for some hot cock?’ (sorry mum).

Enough.

So the Ginger Pig have started doing er, chickens. They’ve started selling these hulking beasts that are a cross between a Cornish game cockerel and a Sussex or Dorking hen. They’re 100 days old (as opposed to 65 for the average commercially grown free range British chicken), they’re dry plucked and then hung for a week to bring out the flavour. That’s a special bird. A special cock. You’re not going to find cock of that quality elsewhere (snigger). They’re massive too, with obscenely plump legs. I’ve always been a thigh woman…

I was sent a cock in the post (giggle), to play around with (smirk), along with some advice to cook it ‘low and slow’. This would ideally happen with some liquid; in a casserole or pot roast for example. Problem is, I didn’t want to do that. I wanted to do something silly like smearing the cock with a kick ass spice paste, wrapping it in flatbreads and cooking it for four hours. So I did. And it worked. Ha! I do this all the time with regular chickens by the way, it’s a Middle Eastern recipe I found in one of my favourite cook books – A Tale of Twelve Kitchens by Peckham based artist Jake Tilson.

So you sacrifice the crisp skin with this recipe, let’s face up to that right now, but what you get instead is meat of super succulence and a load of bread that has spent 4 hours soaking up chicken fat, juice and spice and let me tell you, it’s off the hook. I witnessed an actual fight over the last piece of that bread between two people that have been friends for quite some years. Be warned.

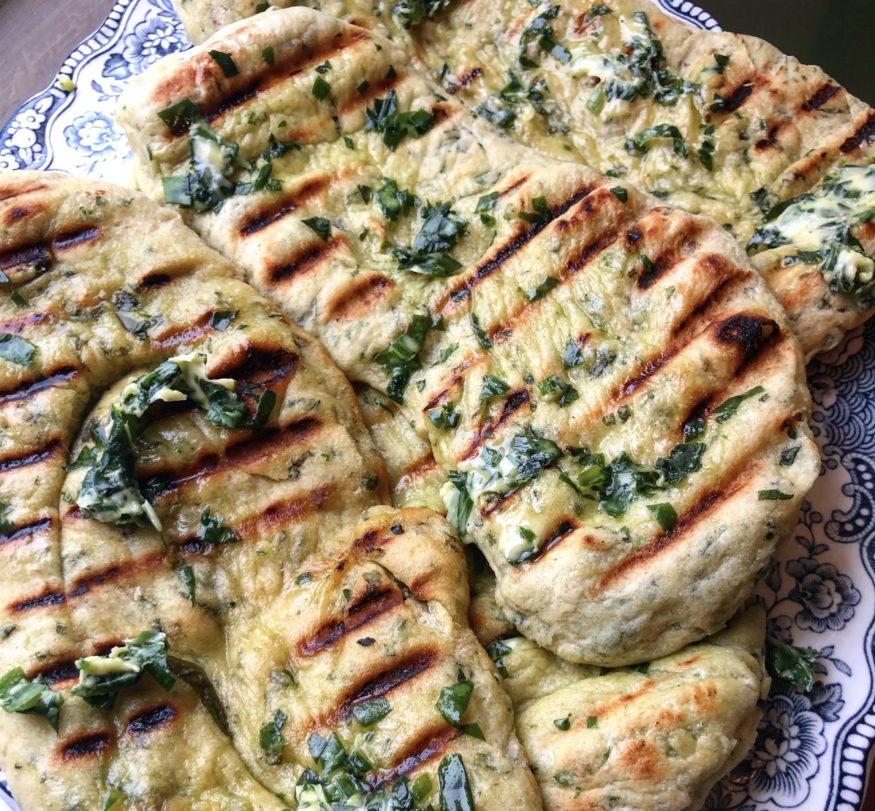
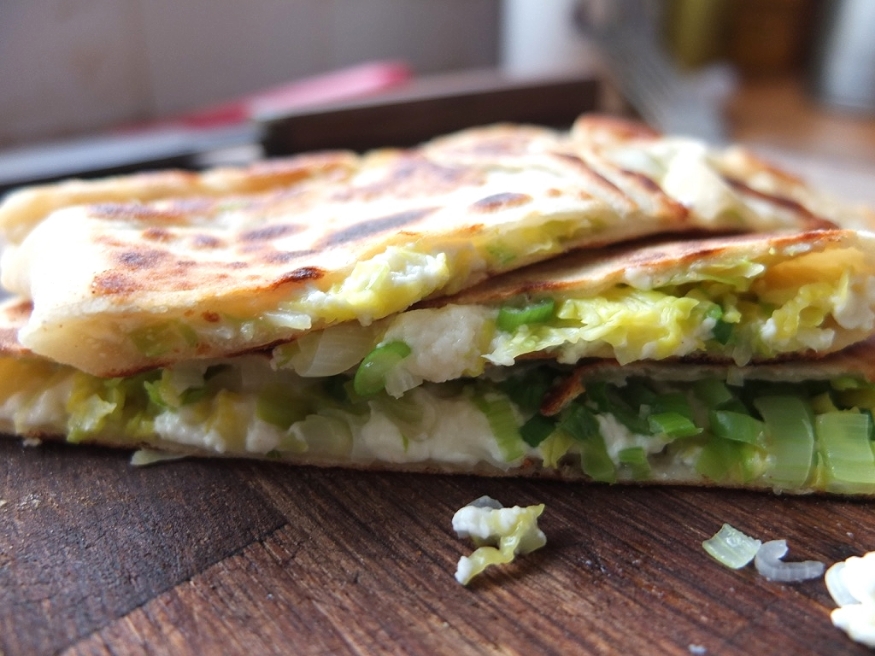
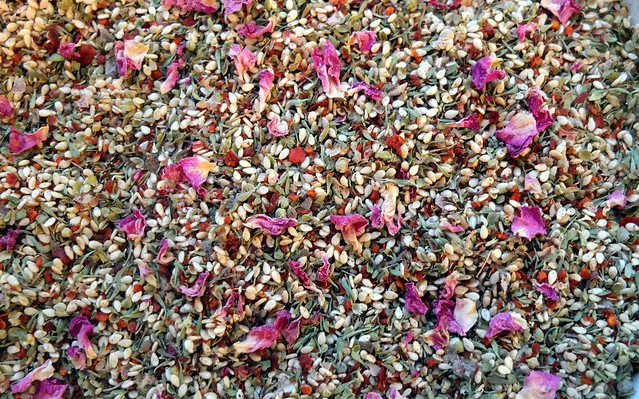
I made the spice paste by slinging the following into a blender: two onions, 3 cloves of garlic, 2 tablespoons za’atar (a mixture of thyme, sumac, sesame seeds and salt), hot chilli flakes and a splash of oil. I then slapped it all over that cock. Intense. After the slapping part it’s the wrapping part, which is pretty much a case of doing your best to get it all enclosed. I always use a packet of khobez from Persepolis in Peckham (3 or 4 to a pack), which split apart nicely and are the perfect thickness. It’s widely available in London but if you can’t get it I suggest you just do your best with whatever you can find. Don’t use anything too thin like lavash however, as it will crisp up too much and burn.

So what of the cooked cock? Well, I was worried about it to be honest; the drawback of this cooking method is that it’s impossible to check on the progress of it once wrapped. I cook a regular chicken this way for 3 hours at 175 degrees. This seems like an age of course but the bird stays very juicy due to the wrapping. I’ve no idea why it’s cooked for so long but that’s what Jake told me to do so I don’t argue. As I’d been warned the cock would take even longer to cook, I gave it 4 hours to be on the safe side which was probably totally unnecessary (although it did no harm). As a friend advised me at the time of cooking, ‘I’d say 4 hours at 175 degrees would cook fucking anything to be honest.’ Well, quite.

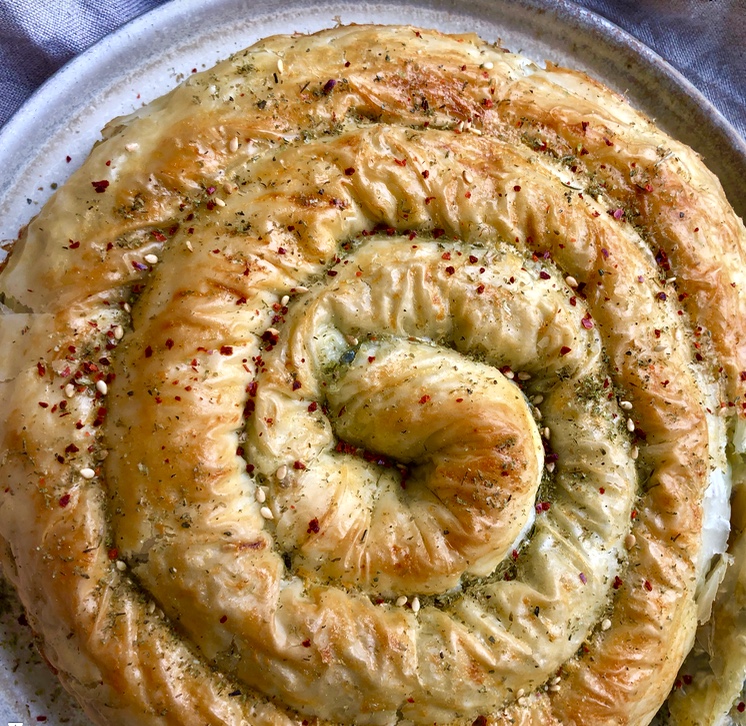
This dish is all about the big reveal. Wang it in the middle of the table and crack the crust to release the fragrant spicy meat puff. Ooooh! Aaaaaaah! Once the steam dissipates, the cock is revealed; the drama of de-mummification. At first I was a little taken aback by the funk of the bird; it smelled a little more high than the average chook. In the mouth though, that translated to chicken flavour to the power of 100 days + hanging for 1 week. It’s aged for a reason…

I served my bird on Persian style rice; basmati steamed with cardamom and streaked with steeped saffron. The shredded meat was dabbed with bits of the spice paste and then, then, scattered with what is possibly the best garnish ever: chopped dates fried in butter. They’re really high in calories, what with all that natural sugar and the liberal addition of saturated fat, which is why they taste incredible. If you’re not into the savoury/fruit thing which I know weirds people out sometimes, try them as a topping for ice cream. I wouldn’t want anyone to miss out.

Okay so it’s not the prettiest of dishes but it tastes incredible, it’s fun and it’s always possible to panic garnish with out of season pomegranate seeds, to give it some colour and make it look better in a photo…a little tip for you there. Damn, I could charge for this shit.

The cockerels are available to buy from Ginger Pig now. They cost £8.50/kg, which isn’t cheap by any stretch, but is only a couple of quid more than a standard free range bird and they’re pretty unique. A 3kg bird will feed about 6 people, or greedy me for 3 days.

See here for Ginger Pig branch locations

Mummified Cockerel

1 x 2.75 kg (or similar sized) cockerel
2 average sized onions
3 cloves garlic
Hot chilli flakes (about a generous tablespoon I suppose)
3 tablespoons za’atar
Salt
A splash of oil
3-4 khobez flat breads (or similar), for wrapping

Preheat the oven to 175c.

Whack the onions, garlic, chilli flakes, za’atar, oil and some salt in a blender. Blend it. Smear it all over the cockerel, inside and out, but mostly out. Split one of the flatbreads so that it is still joined on side; you basically want to tuck the chicken into a bready pocket. Do that. Then keep doing it until you’ve mummified the cock. Just do your best to make sure it’s all wrapped up.

Wrap it loosely in foil and put it in the oven. Cook for 4 hours. Every 45 minutes or so take it out and brush the top of the flatbread liberally with water; this should stop it from burning. You won’t be eating the top bit anyway but burnt stuff doesn’t taste good so don’t skip this bit.

After 4 hours it should be ready; who knows, it might even be ready after 3. Anyway, crack the flatbread crust and get stuck in.

Rice Iranian Stylee (these are Sally Butcher’s quantities from Veggiestan, which means they cater for Iranian – meaning large – appetites. This is also her method for cooking rice, which never fails)

600g rice
800ml water
Generous knob of butter
Pinch saffron strands steeped in a little boiling water
1/2 teaspoon ground cardamom
Pinch ground cinnamon
A few dates, chopped
More butter for frying the dates

Wash the rice well. Put the water and butter in a pan with some salt and bring it to the boil. Add the rice and let it come back to the boil, then turn the heat down really low. Tie a clean tea towel around the lid of the pan, then put it on and let it simmer very gently for 20 minutes. After this time, lift the lid, stir in the cardamom and cinnamon, put the lid back on and steam for another 10 minutes.

Melt some butter in a pan and fry the dates in it for a few minutes.

Streak the saffron through the rice and serve with the chicken and dates on top.

Aubergine and Lamb Pide

I’ve got a new oven. This is brilliant for 2 reasons. Firstly, it’s all clean and shiny; I mean, how often does your oven look clean and shiny on the inside? Not very often I think you’ll find. Not if you’re a slovenly layabout like me anyway. Second, my old oven was, quite frankly, a piece of shit. It had no numbers on the temperature dial and no symbols for the oven settings and it cooked unevenly so that everything had to be turned around halfway through or it would burn on one side – not exactly ideal.

So, I cooked pide in my swanky new oven; I made nice, evenly cooked pide and I knew exactly what temperature I was cooking them at by means of the lovely little digital display (imagine my panic when I saw the temp dial had no numbers around the outside). That’s 15 minutes at 220C, in case you’re wondering.

Pide are rather similar to lahmacun* and are apparently sold on every street corner in their homeland. I topped mine with aubergine (which I blackened on the gas hob before scooping out the smoky flesh); lamb, minced; spices like coriander, cumin and cinnamon; onion, garlic and a little tomato. At one point I was feeling particularly rock and roll and recklessly squeezed in some incredible  Le Phare du Cap Bon harissa (from The Good Fork – they have some great stuff, like sardine spread, which is impossible to stop eating). Very spicy indeed. You could also use the fiery red pepper paste found in Middle Eastern shops or failing that just a decent amount of chopped red chilli.

I garnished the finished pide with diced Persian pickles (dill pickles would make a nice substitute), a sprinkle of lemon juice and some parsley. These things are essential for distracting from the richness of the lamb. The dough is a piece of piddle too. Well, it is if you have an electric mixer, anyway. It was thin, yet soft – extremely easy to demolish.

The end result is a bit like a banana shaped pizza. A delicious, meat-smeared boat of soft, spicy flatbread. Very evenly cooked.

*If you like the look of this, you’ll probably also like the look of my similar, Peckham Pizza.

Smoky Aubergine and Lamb Pide

(makes 4)

For the topping:

1 large-ish aubergine
250g minced lamb
1/2 onion, finely chopped
1/2 teaspoon coriander seeds
1/2 teaspoon cumin seeds
Pinch ground cinnamon
1 clove garlic, crushed
2 tomatoes
A squeeze of tomato puree
2 red chillies (or a squeeze of very good quality, hot harissa)

To garnish:

Chopped pickled cucumbers, chopped parsley and lemon juice

Place the aubergine on the ring of a gas hob on a low heat (or under the grill), turning often, until completely blackened and collapsed. I think the hob gets a more smoky flavour but it sure as hell makes a mess. Once cool enough, scrape out the flesh, taking care to avoid any pieces of black skin. Finely chop the flesh. Set aside and discard the skins.

Skin the tomatoes by scoring a cross in the bottom and covering with boiling water for a couple of minutes. Drain, peel away the skin and chop finely. Toast the cumin and coriander seeds in a dry pan over a low heat, moving them around; when they start to smell fragrant, tip them into a pestle and mortar or spice grinder and grind to a powder.

Sauté the onions in a little oil and when soft, add the chilli and garlic and continue cooking for 30 seconds or so, stirring. Add the spices and stir again for another 30 seconds. Add the lamb and cook, breaking up the meat with a spoon, until it is all brown and cooked through. Add the tomatoes and aubergine flesh and cook for about 10-15 minutes, until any excess liquid has cooked out. Taste and season with salt and pepper. The topping is now ready so allow it to cool.

For the dough:

For the dough I used a recipe I found online which I now can’t locate for the life of me. If it’s your recipe, I’m sorry! I’ll reproduce it here anyway.

1 x 7g sachet fast action dried yeast
1 teaspoon sugar
150ml warm water
300g plain flour
1 teaspoon salt
2.5 tablespoons olive oil + more for brushing

Mix the yeast and sugar with the warm water. You want warm water, not hot, as it will kill the yeast. Leave it to one side to activate. When it’s ready (in about 5 minutes), it should be very frothy on top. If not, your water wasn’t warm enough or it was too hot – start again.

Sift the flour and salt into the bowl of an electric mixer or large mixing bowl. Add the yeast mixture and oil. If using a mixer, set it on low speed for 10 minutes until you have a smooth, elastic dough. If mixing my hand, you’re going to have to knead it until you have the same result.

Put the dough in a lightly oiled bowl and cover with a damp tea towel. Let it rise for about half an hour, or until doubled in size. Knock back the dough then cut into 4 pieces. Roll each piece out into a rectangle with tapered ends (much easier than it sounds – they don’t need to be neat at all).

Preheat the oven to 220C

Put each rectangle onto a baking tray lined with baking paper and then smear the topping over each, spreading it evenly. Fold up the sides of each pide and crimp at the ends. Brush the edges with olive oil and bake for 15 minutes. Brush the crust with olive oil once more when cooked. Sprinkle with the garnish and serve.