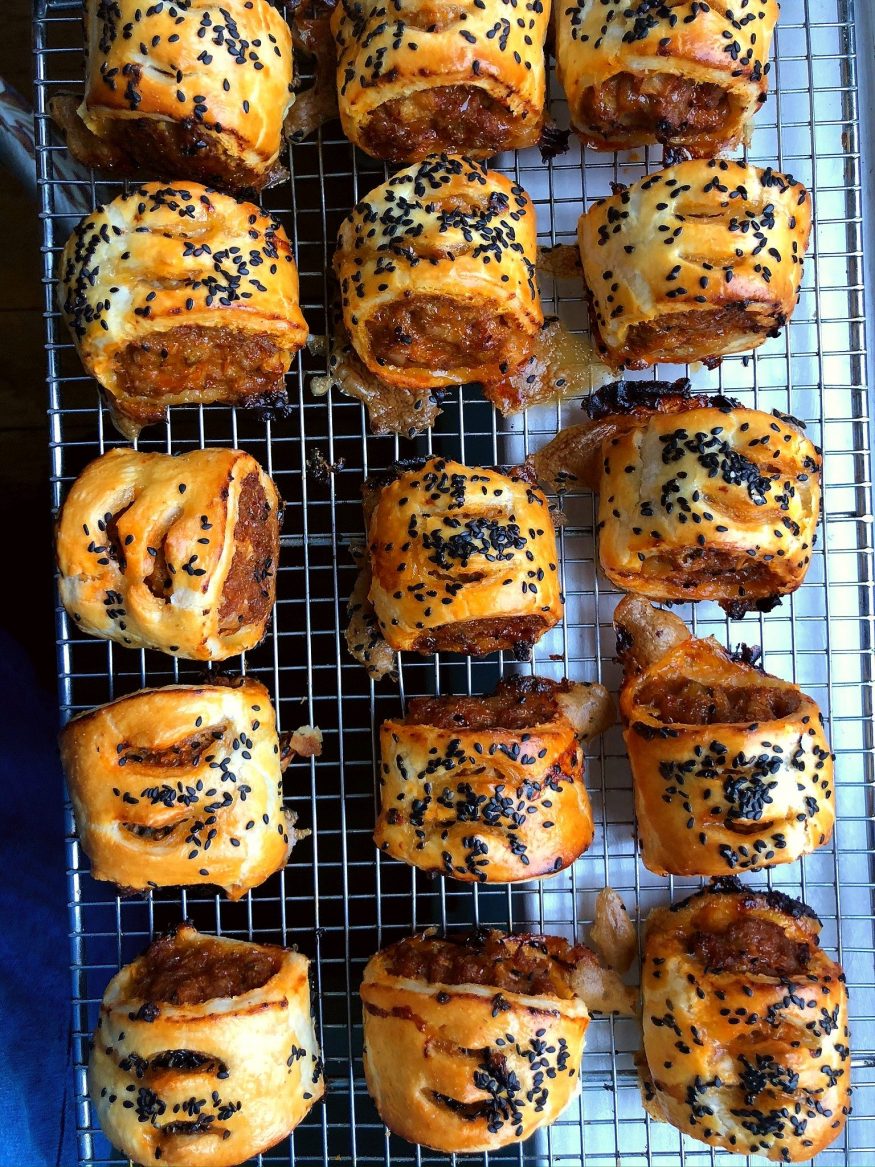
Guys, these are the best sausage rolls I’ve ever made and rest assured I have made many. Recipes on this site range from the simplest (just squeezing sausages into pastry, basically), to a version with venison, pork and sherry, or apricots and whisky-caramelised onions (still one of the most popular recipes on this website!)

And now, here I am fermenting sprouts into seasonal kimchi and flavouring my sausagemeat with gochujang. If you can stop yourself from eating three in quick succession then you are a stronger woman than I.

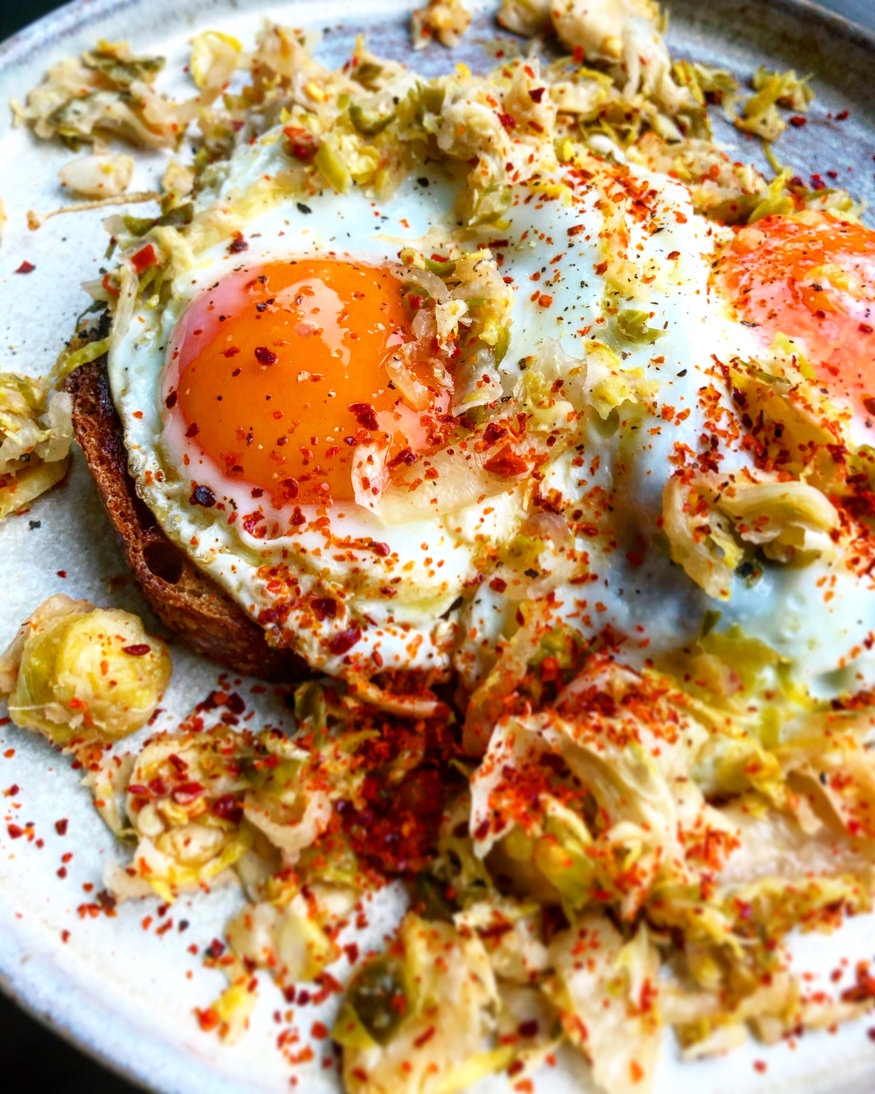
So I was compelled to share the recipe with you as soon as possible. You’ll need to make the Brussels sprout kimchi first but it’s so easy anyone can do it and then you’ll be able to eat that in cheese toasties and on eggs and so many other brilliant things I haven’t thought of yet for the rest of the festive season. Of course, you could use regular kimchi instead but the end result will be different.

Yes, mince pies and roast potatoes and trifle are good but what your Christmas table really needs is a healthy dose of fermented sprouts, and I won’t hear otherwise.

Gochujang and Brussels Sprout Kimchi Sausage Rolls Recipe

Makes approx 18 sausage rolls

1 kg sausagemeat (better quality meat means a better sausage roll – seems obvious but worth saying nonetheless)
1 packet puff pastry (I used Jus Rol because life’s too short etc.)
3 tablespoons gochujang
150g Brussels sprout kimchi
2 eggs, lightly beaten
Black sesame seeds to decorate

Preheat the oven to 200C.

Mix the sausagemeat, gochujang and kimchi in a large bowl. Pull a small piece out and form it into a patty then fry it in a dry pan until cooked so you can check you’re happy with the flavour.

Roll out the pastry on a lightly floured surface – you want a large rectangle and a thickness of 2-3 mm, so quite thin.

Divide the meat mixture in two, then cut the pastry in two lengthways. Make two long sausages on top of each half of the pastry and brush the edges with beaten egg.

Fold over the pastry and seal, turning over so the seal is on the bottom. Cut each into 2-inch lengths and arrange on baking trays. I like to make two snips in the top of each sausage roll with scissors.

Brush very well with beaten egg and sprinkle with black sesame seeds.

Bake for 20-25 minutes or until deep golden brown. Cool on a wire rack, if you can wait that long.


Brussels sprout kimchi! Has she gone mad? Absolutely not – they’re just mini cabbages, after all. This makes one of my favourite ever kimchis and of course, it’s fiercely seasonal. I cannot emphasise enough just how well this works in a toastie with Stilton, and also the day after in a toastie with Cheddar and ham. Imagine putting it in your Christmas leftovers sandwiches! It’s perfect in the morning with eggs as well.

Basically what I’m saying is that no one should be without this kimchi during the festive season and if you make it now you’ll have a massive jar to see you right through until January.

Give the gift of sprout-chi to your gut microbiome this Christmas!

Brussels Sprout Kimchi Recipe

This isn’t a particularly spicy kimchi so adjust to your taste. I like to eat my toasties with sriracha so we kept this quite mild. It’s tangy and fizzing with all your usual brilliant kimchi flavours and the sprouts have a lovely lemony edge to them.

1kg brussels sprouts, sliced (I did this in a food processor)
1 daikon, cut into strips or sliced (I did mine in julienne)
1 Chinese cabbage, sliced
2 heads garlic, cloves peeled
1/2 cup Korean chilli flakes (you can literally just measure this in a mug)
2 inches ginger, peeled
3 tablespoons white miso

Place the shredded sprouts, daikon and Chinese cabbage in a bowl with a good handful of fine salt and mix well – don’t worry about the quantity because you’ll rinse a lot of it off afterwards. Squeeze it with your hands until some juice forms, then top it up with enough water to cover it. Weight it down with something heavy-ish like a sturdy pan. Cover and leave overnight.

Sterilise a 2 litre Kilner jar.

Blend the garlic, ginger, miso and chilli in a blender.

Rinse the veg then mix with the garlic paste and pack into the jar, pressing it down firmly with your fist. I cover my ferments with a zip lock bag filled with water because it moulds to the shape of the ingredients and jar nicely, making sure it’s all submerged – a small dish or ramekin would be a non-plastic alternative.

Leave to ferment at least 4 days before tasting but make sure you open the jar to burp it once a day.

I made mine around 10 days ago and I am keeping it at room temp but burping every day. It will keep actively fermenting at this temperature and the flavour will develop, so it’s up to you when you’d like to stop that process. When you do, just transfer it to the fridge where you won’t need to keep burping it.

We wanted to preserve some of our huge bag of wild garlic for the coming months so we made wild garlic pesto (practically a law at the start of the season), wild garlic butter (brilliant with boiled eggs) and a batch of wild garlic kimchi. This recipe is one for those who enjoy a powerfully flavoured’ kimchi. It does not pull any punches but that’s the way we like it – even with eggs at breakfast time.

The second recipe uses purple carrots and lots of ginger to make a pink-purple kimchi which looks fantastic and has a lovely sweet, hot flavour. We’ve been eating these in sandwiches (try this kimchi and cheese toastie recipe), in kimchi and corn fritters, with fish and vegetable rice bowls and just on its own as a snack. I also love my mate Lizzie’s idea of using it in fried rice. So many possibilities!

Wild Garlic Kimchi Recipe

Fills a 2 litre Kilner jar 

1 Chinese cabbage, outer leaves removed and roughly chopped
1 mooli, peeled and grated
2 turnips, peeled and grated
50g of fine-grained salt
400g wild garlic thoroughly washed and roughly chopped
6 garlic cloves, peeled and left whole
¼ cup Korean chilli flakes (gochugaru)
1 tbsp white miso
1 tbsp rice flour

Massage the salt into the cabbage, mooli, turnip and wild garlic in a large bowl until they start to weep juice (this takes around a minute or so), then cover with cold water. Place a plate on top to keep the veg below the water and leave somewhere fairly cool (no need to refrigerate) for 24 hours.

After this time, give the veg a good rinse. In a blender, blitz the garlic cloves, Korean chilli flakes, miso and flour until you have a paste. Mix with the veg.

Pack it into a 2 litre sterilised Kilner jar, pushing down firmly. If there isn’t enough juice to cover the kimchi add some water, then seal. You can either leave the clip open and tie an elastic band around it tightly so that the lid is tied shut but has enough room for some gas to escape or take the danger route which is to seal it fully and remember to burp it every day or so. If you’re particularly worried about this you can also now buy self-burping jars.

The kimchi will start to ferment after 2-3 days and will be ready to eat in a week or so.

Purple Carrot and Ginger Kimchi Recipe

Fills a 2 litre Kilner jar 

1 Chinese cabbage, outer leaves removed and roughly chopped
6 purple carrots, peeled and finely sliced
1 mooli, peeled and finely sliced into strips
2 turnips, peeled and finely sliced
50g of fine-grained salt
20 cloves of garlic, peeled and left whole
3 inches ginger, peeled
½ cup Korean chilli flakes
4 tbsp rice koji (or 3tbsp white miso)
1 tbsp fish sauce

Massage the salt into the cabbage, carrots, mooli and turnip in a large bowl until they start to weep juice (this takes around a minute or so), then cover with cold water. Place a plate on top to keep the veg below the water and leave somewhere fairly cool (no need to refrigerate) for 24 hours.

After this time, give the veg a good rinse. In a blender, blitz the garlic cloves, ginger, Korean chilli flakes, koji (or miso) and fish sauce. Mix with the veg.

Pack it into a 2 litre sterilised Kilner jar, pushing down firmly. If there isn’t enough juice to cover the kimchi, add some water, then seal. You can either leave the clip open and tie an elastic band around it tightly so that the lid is tied shut but has enough room for some gas to escape or take the danger route which is to seal it fully and remember to burp it every day or so. If you’re particularly worried about this you can also now buy self-burping jars.

Sweetcorn and Kimchi Fritters

So brunch is a big thing, then. We’re not allowed to go out for breakfast any longer – we must brunch. The Australians are mad for it, with their avocados and endless cups of coffee. In America, they’ve long loved those stacks of impossible-to-finish pancakes dripping in syrup. Why a stack? One of those fluffy facecloths is enough. I had a shock the first time I saw a plate of those arrive, let me tell you, giving the waitress my best, ‘when will the other people be arriving?’ look. She didn’t care, it’s normal. They’re used to picking up the remains and chucking them straight in the bin.

I feel a bit like this about brunch in general, it’s all just too much for the morning. Eggs, meat, bottomless booze and all of the rich things on one plate. Instead of setting you up for the day, this meal can easily send you back to bed. I like to draw the line at a single egg, a couple of bacon rashers and my new secret weapon – the corn and kimchi fritter. Corn fritters are obviously brilliant already (what with them containing corn and all), and kimchi goes really well with their sweetness, adding its own special funky punch of heat and crucially, acidity to lighten things. The drippy egg means it’s enough to fill you up, but not f*ck you up, because we all have stuff we’d like to do on a Saturday morning that doesn’t involve going back to bed, right?

Sweetcorn and Kimchi Fritters

Makes 12 fritters.

140g plain flour
1/2 teaspoon baking powder
220ml milk
3 spring onions, finely sliced (plus another to serve)
1 x 165g can sweetcorn (drained weight)
150g kimchi, roughly chopped
Small handful of coriander leaves, chopped
Oil, for frying

Bacon and eggs, to serve

Mix the flour and baking powder then whisk in the milk to make a smooth but thick batter. Add the other ingredients (saving 1 spring onion and a little coriander for garnish). Season with salt and pepper.

Heat some oil in a frying pan, a couple of tablespoons to start, you can add more as you go, and drop tablespoons of the mixture into the pan. Flatten them out and cook for a minute or so each side until golden. Set aside on kitchen paper while you cook the others.

Serve with grilled bacon and a poached egg. Scatter with the remaining spring onion and coriander to serve.