
This is a recipe I’ve developed as part of a paid partnership with Parmigiano Reggiano.

It’s only in recent years I’ve begun to throw myself into seasonal cookery as part of my plan to reclaim Christmas as something more my own, rather than focusing on all the aspects I don’t enjoy (see: the whole religious festival thing, the stress, tinsel). Obviously, the social side is fun, and it’s nice to have a break – even if I didn’t bloody choose to have one thankyouverymuch – but for me, it’s about trying to enjoy myself in non-traditional ways and not get annoyed with gaudy lights and forced participation.

I’ve chosen to buy a non-traditional tree, for example. I was always whining that I didn’t like the green pointy variety, so why did I ever consider buying one? Mine’s a willowy silver number covered with food-themed baubles and a crab on top instead of an angel. So there.

Please don’t for a moment think I am judgemental about the ways in which others enjoy Christmas because nothing could be further from the truth. I think there is a lot of pressure at this time of year to do things a certain way, and what I’m trying to say is that it’s helped me a lot to find my own path.

Food can become oddly competitive too, which is a shame because it’s arguably the best thing about Christmas {insert caveat about family time here}. Over the years I’ve developed some recipes which have become firm favourites (these sausage rolls with whisky caramelised onions for example) and some which are popular newcomers (looking at you, Brussels sprout kimchi).

I think one thing we can all agree on is that it’s necessary to ensure a steady stream of snackage, and these croquettes are a perfect little bite. They’re just mashed potato, bacon, Brussels and plenty of Parmigiano Reggiano made into balls and deep-fried, and you could easily swap in some leftover ham or other greens if you felt like it.

The Parmigiano Reggiano brings moreish savouriness and depth of flavour, plus it’s very handy to have around at this time of year – try grating it onto puff pastry and twisting into straws before baking for the easiest last-minute party snack for example, or use as a filling for palmiers with anchovy. It would be great in some miniature tartlets with crab as a smart starter, or try adding to stuffing for a savoury note that will keep people guessing.

The most important thing is not to stress, and I think one of the nicest ways of hosting at Christmas is to invite people round, tell them to bring their own bottles, make a big pile of literally just one snack and have them dig in. These are cute and filling enough to keep everyone satisfied and you don’t have to faff about with multiple tasks. They work nicely with a quick n’ dirty dip made with mayonnaise, a touch of yoghurt, chives, garlic and more Parmigiano Reggiano. Dive in, kick back and try not to worry about what on earth you’re going to buy that cranky old uncle you don’t particularly care for.

Parmigiano Reggiano, Bacon and Brussels Sprout Croquettes Recipe

Makes 25-30 croquettes, depending on size

700g potatoes for mashing such as Maris Piper
2 egg yolks, plus 2 whole eggs for coating
100g grated Parmigiano Reggiano
120g Brussels sprouts, stalks removed and finely shredded
240g bacon (8 thin rashers), large pieces of fat removed and finely diced
Flour, for coating
Breadcrumbs, for coating
Oil, for frying

Cook the potatoes in salted water, then mash them until very smooth.

Add the bacon to a hot, dry frying pan and cook until just beginning to crisp, then add the sprouts and stir well. Cook, stirring, just until the sprouts have softened.

Mix mashed potatoes, Parmigiano Reggiano, sprouts, bacon and some salt and pepper. Taste for seasoning, then add the yolks and mix well.

Roll into walnut-sized balls and chill for at least 2 hours.

When you’re ready to cook the croquettes, cover one plate with flour, another with beaten egg and another with breadcrumbs. Using one hand for dry ingredients and one for wet, coat each ball in flour, then egg, then crumb.

Heat oil for deep frying to 180C. Turn an oven on low (50C or thereabouts).

Cook the croquettes in batches of 4 or 5, turning often, until golden brown all over (2-3 minutes should do it).

Drain on kitchen paper and transfer to the oven to keep warm while you cook the rest.

For the dip, I just mixed few tablespoons of mayo with a couple of yoghurt, a squeeze of lemon, a clove of garlic and plenty of grated cheese. Garnish with a few chives and you’re all set.

Guys, these are the best sausage rolls I’ve ever made and rest assured I have made many. Recipes on this site range from the simplest (just squeezing sausages into pastry, basically), to a version with venison, pork and sherry, or apricots and whisky-caramelised onions (still one of the most popular recipes on this website!)

And now, here I am fermenting sprouts into seasonal kimchi and flavouring my sausagemeat with gochujang. If you can stop yourself from eating three in quick succession then you are a stronger woman than I.

So I was compelled to share the recipe with you as soon as possible. You’ll need to make the Brussels sprout kimchi first but it’s so easy anyone can do it and then you’ll be able to eat that in cheese toasties and on eggs and so many other brilliant things I haven’t thought of yet for the rest of the festive season. Of course, you could use regular kimchi instead but the end result will be different.

Yes, mince pies and roast potatoes and trifle are good but what your Christmas table really needs is a healthy dose of fermented sprouts, and I won’t hear otherwise.

Gochujang and Brussels Sprout Kimchi Sausage Rolls Recipe

Makes approx 18 sausage rolls

1 kg sausagemeat (better quality meat means a better sausage roll – seems obvious but worth saying nonetheless)
1 packet puff pastry (I used Jus Rol because life’s too short etc.)
3 tablespoons gochujang
150g Brussels sprout kimchi
2 eggs, lightly beaten
Black sesame seeds to decorate

Preheat the oven to 200C.

Mix the sausagemeat, gochujang and kimchi in a large bowl. Pull a small piece out and form it into a patty then fry it in a dry pan until cooked so you can check you’re happy with the flavour.

Roll out the pastry on a lightly floured surface – you want a large rectangle and a thickness of 2-3 mm, so quite thin.

Divide the meat mixture in two, then cut the pastry in two lengthways. Make two long sausages on top of each half of the pastry and brush the edges with beaten egg.

Fold over the pastry and seal, turning over so the seal is on the bottom. Cut each into 2-inch lengths and arrange on baking trays. I like to make two snips in the top of each sausage roll with scissors.

Brush very well with beaten egg and sprinkle with black sesame seeds.

Bake for 20-25 minutes or until deep golden brown. Cool on a wire rack, if you can wait that long.


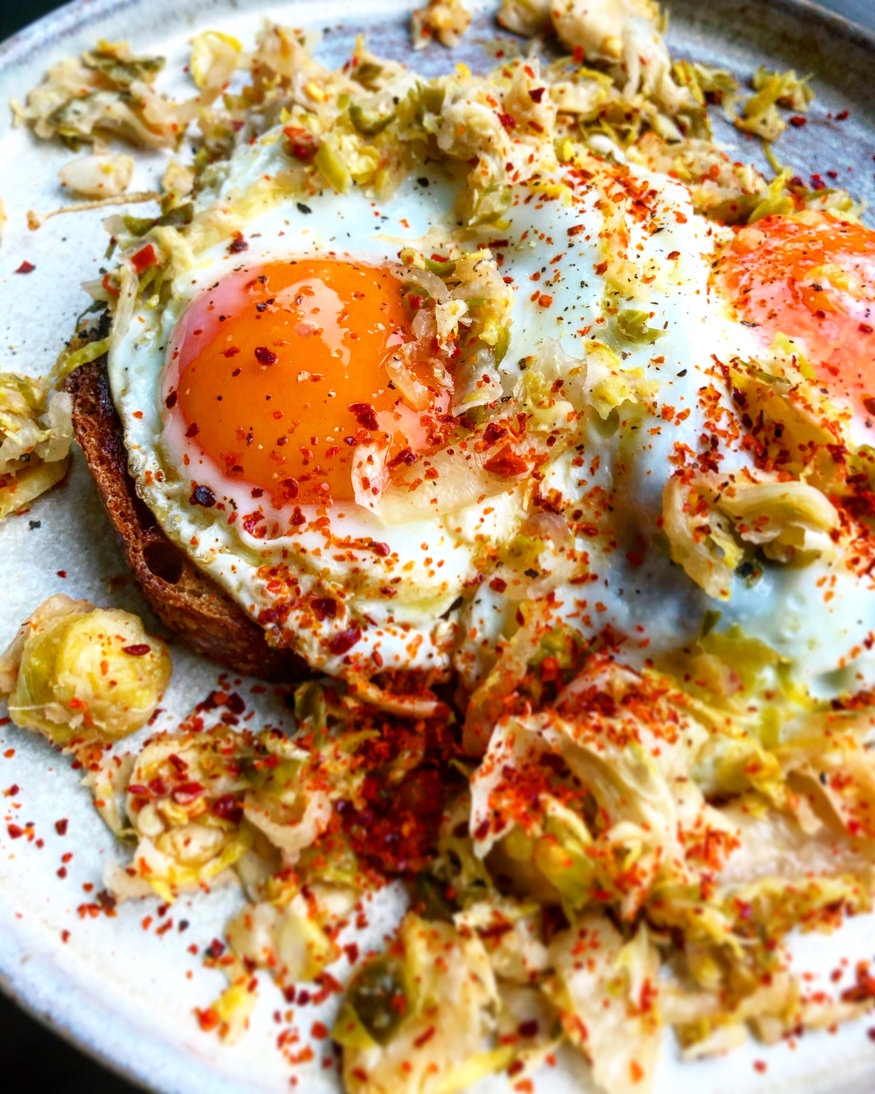
Brussels sprout kimchi! Has she gone mad? Absolutely not – they’re just mini cabbages, after all. This makes one of my favourite ever kimchis and of course, it’s fiercely seasonal. I cannot emphasise enough just how well this works in a toastie with Stilton, and also the day after in a toastie with Cheddar and ham. Imagine putting it in your Christmas leftovers sandwiches! It’s perfect in the morning with eggs as well.

Basically what I’m saying is that no one should be without this kimchi during the festive season and if you make it now you’ll have a massive jar to see you right through until January.

Give the gift of sprout-chi to your gut microbiome this Christmas!

Brussels Sprout Kimchi Recipe

This isn’t a particularly spicy kimchi so adjust to your taste. I like to eat my toasties with sriracha so we kept this quite mild. It’s tangy and fizzing with all your usual brilliant kimchi flavours and the sprouts have a lovely lemony edge to them.

1kg brussels sprouts, sliced (I did this in a food processor)
1 daikon, cut into strips or sliced (I did mine in julienne)
1 Chinese cabbage, sliced
2 heads garlic, cloves peeled
1/2 cup Korean chilli flakes (you can literally just measure this in a mug)
2 inches ginger, peeled
3 tablespoons white miso

Place the shredded sprouts, daikon and Chinese cabbage in a bowl with a good handful of fine salt and mix well – don’t worry about the quantity because you’ll rinse a lot of it off afterwards. Squeeze it with your hands until some juice forms, then top it up with enough water to cover it. Weight it down with something heavy-ish like a sturdy pan. Cover and leave overnight.

Sterilise a 2 litre Kilner jar.

Blend the garlic, ginger, miso and chilli in a blender.

Rinse the veg then mix with the garlic paste and pack into the jar, pressing it down firmly with your fist. I cover my ferments with a zip lock bag filled with water because it moulds to the shape of the ingredients and jar nicely, making sure it’s all submerged – a small dish or ramekin would be a non-plastic alternative.

Leave to ferment at least 4 days before tasting but make sure you open the jar to burp it once a day.

I made mine around 10 days ago and I am keeping it at room temp but burping every day. It will keep actively fermenting at this temperature and the flavour will develop, so it’s up to you when you’d like to stop that process. When you do, just transfer it to the fridge where you won’t need to keep burping it.

I have accelerated rapidly from ‘just adding sprouts to a few dishes in small quantities’ through to ‘adding them to everything including those I promised I wouldn’t’. A pal pointed out I’d once lamented the overuse of these mini cabbages saying – and this is a direct quote – ‘God help us but it’s only a matter of time before someone dishes up a sprout Caesar’.

A sprout Caesar is the last recipe I posted on this website.

So yes, fine, I have given in to the sprouts because I feel like they’re just so much more interesting now I’m shredding them, which is ridiculous because I’ve been doing this for years. I’m adding them to fried rice, coleslaw, gözleme, CAESAR SALAD and now dumplings in lieu of cabbage, with pork.

Potstickers are one of my favourite carbs and… oh ok all carbs are my favourite carbs. Look, potstickers are easy to make if you don’t bother with the fancy pleating – tip: they will taste the same unpleated – and they freeze well which means you can always have an arsenal of hangover-smashing pork cushions on hand.

I’m going to try making my own dumpling wrappers next time because the frozen ones tend to get brittle around the edges which makes them a bit harder to seal. Other than that, it’s very simple. You will probably have filling leftover and I suggest you fry it and eat it on top of rice for a quick and satisfying lunch the next day.

Pork and Brussels Sprout Pot Stickers Recipe

This is quite a basic recipe which you can add to for e.g. some rehydrated dried mushrooms such as shitake would boost the umami or you could change the sprouts for the more traditional cabbage, add some minced prawns and so on.

2 packets frozen dumpling wrappers, available from Asian supermarkets (each pack had 16 in it I think) – defrosted!
75g sprouts, shredded
8 Chinese garlic chives (or a few spring onions), finely chopped
150g fatty minced pork (the fat is really important otherwise the dumplings will be dry)
2 tablespoons light soy
1.5 teaspoons sesame oil
1 tablespoon ginger, grated or finely chopped
2 cloves garlic, grated or crushed
1/2 teaspoon white pepper
1 teaspoon sugar
2 teaspoons salt
2 tablespoons oil, for frying
Spring onions, for garnish
1 teaspoon cornflour mixed with a couple of tablespoons of water, for sealing the dumplings

Serve with a dipping sauce made from 3 tablespoons dark soy, 2 tablespoons black vinegar, a teaspoon sesame oil and a little diced ginger and chilli – or whatever you prefer! Often I add chilli oil.

Plunge the shredded sprouts into a pan of boiling water and when they come back to the boil, drain and refresh under cold water. Dry thoroughly.

Mix the pork with the sprouts, chives (or spring onions), light soy, sesame oil, ginger, garlic, white pepper, sugar and salt. You can cook a small piece at this point if you want to check the seasoning.

Take a dumpling wrapper (keep the open packet underneath a damp tea towel to prevent them drying out) and place a teaspoon of filling into the middle. Wet the edge of the dumpling wrapper with the cornflour and water mix) and then bring up the edges. Use your middle finger to push one edge of the wrapper and make a pleat, closing with your opposite thumb (this is much easier than it sounds when you have a go at it). Repeat to make as many pleats as you like, then do the same on the other side. If you don’t want to pleat the dumplings, just press the edges together. I just remembered my mate Lizzie has a video on her blog!

Repeat with all the wrappers. Press the finished dumpling down onto a lightly floured surface to give it a flat bottom, then repeat until all the filling is used up. To cook, heat a lidded frying pan (preferably with a heavy base) over medium heat and add 1 tablespoon of oil, brushing to distribute evenly. Arrange the dumplings in a circle until the pan is full and fry for a couple of minutes until the bottoms have browned. Carefully splash in a couple of tablespoons of water – it will spit and hiss furiously, so put the lid on. Steam the dumplings for around 3 minutes, adding another splash of water if it runs dry. Check the dumplings are nicely browned on the bottom. Serve the dumplings with the dipping sauce.