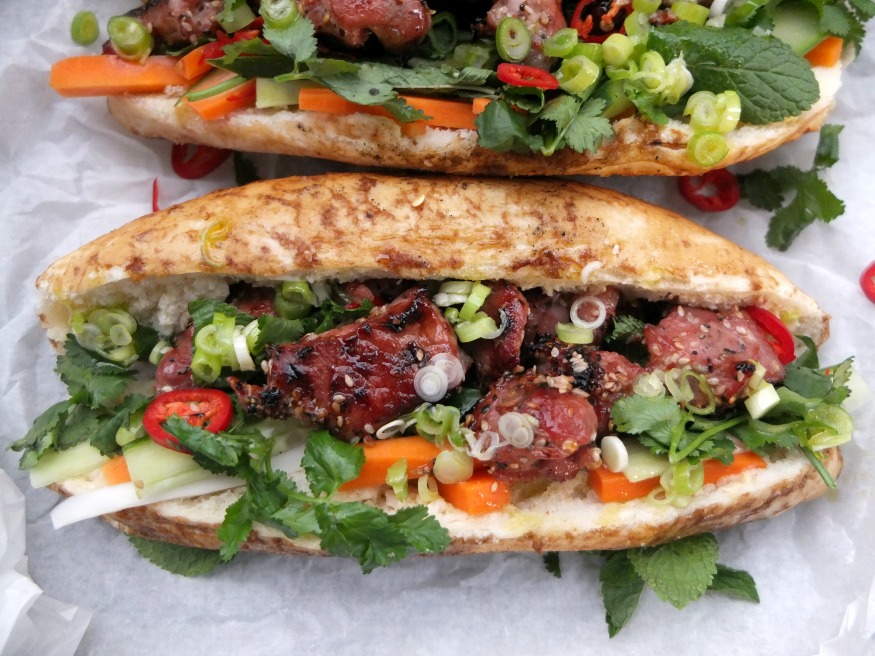
Some of you come here for the sandwiches. I know this because I’ve started doing supper clubs and I actually get to meet you guys. It’s brilliant fun, and I’ve found you’re not shy about telling me what you like/don’t like/miss about this site. A topic that has come up a few times now is my lack of sandwich updates.

This one’s for you, sandwich lovers.

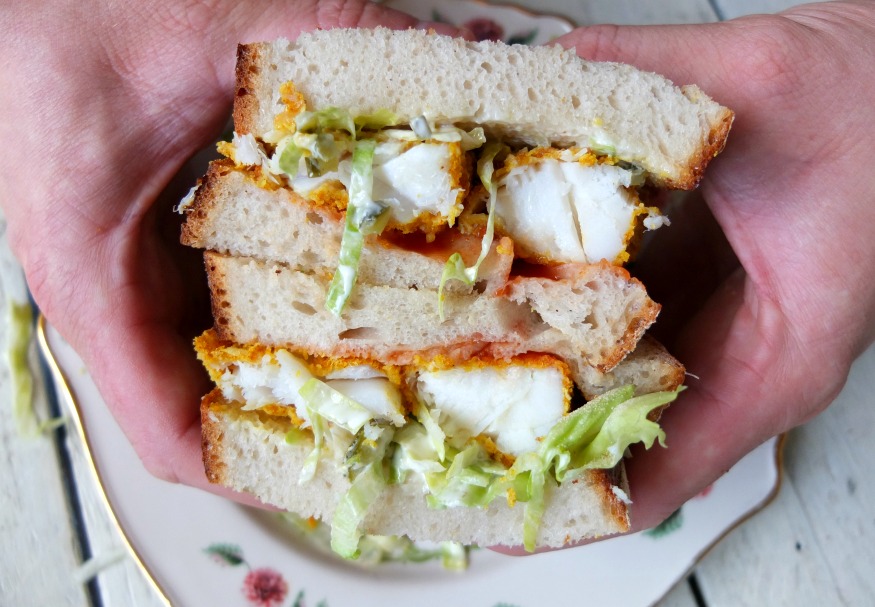
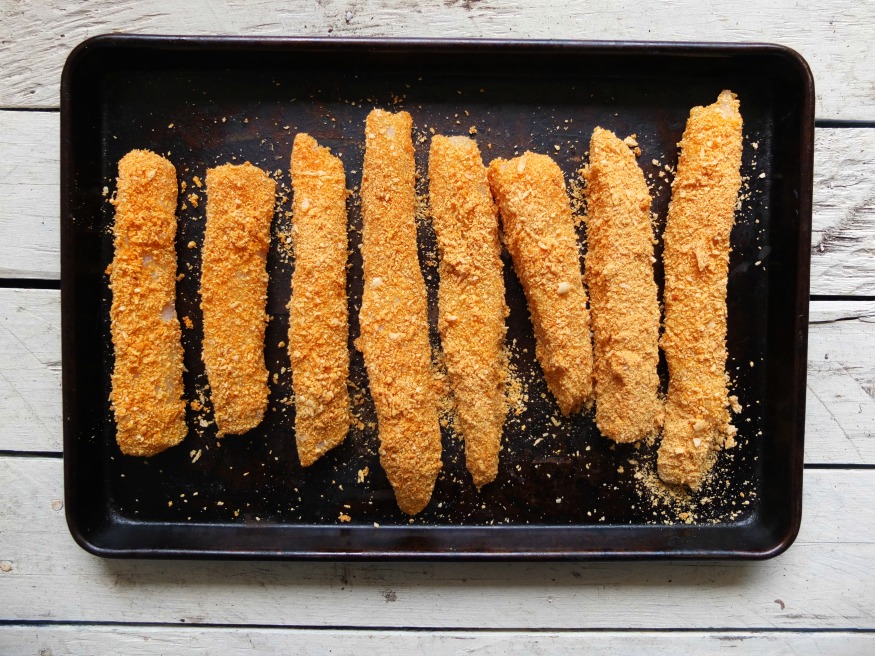
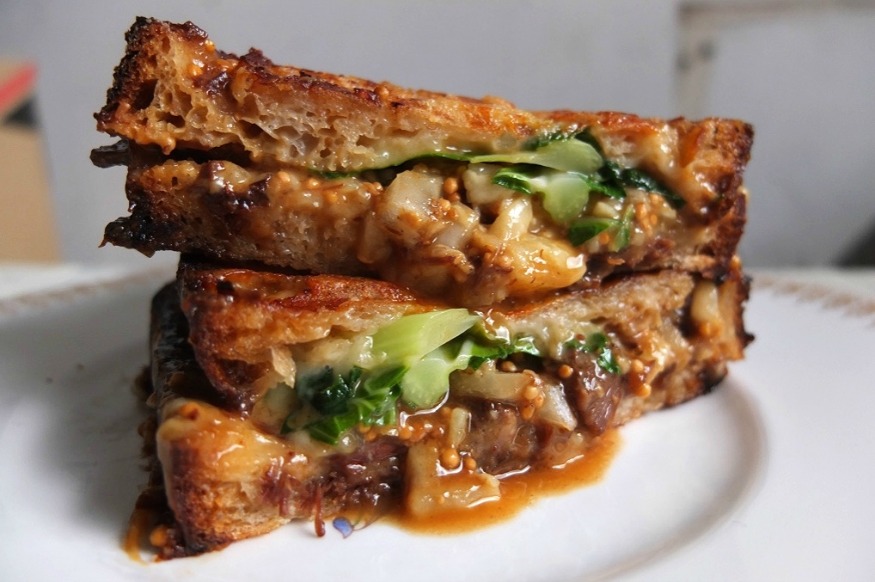
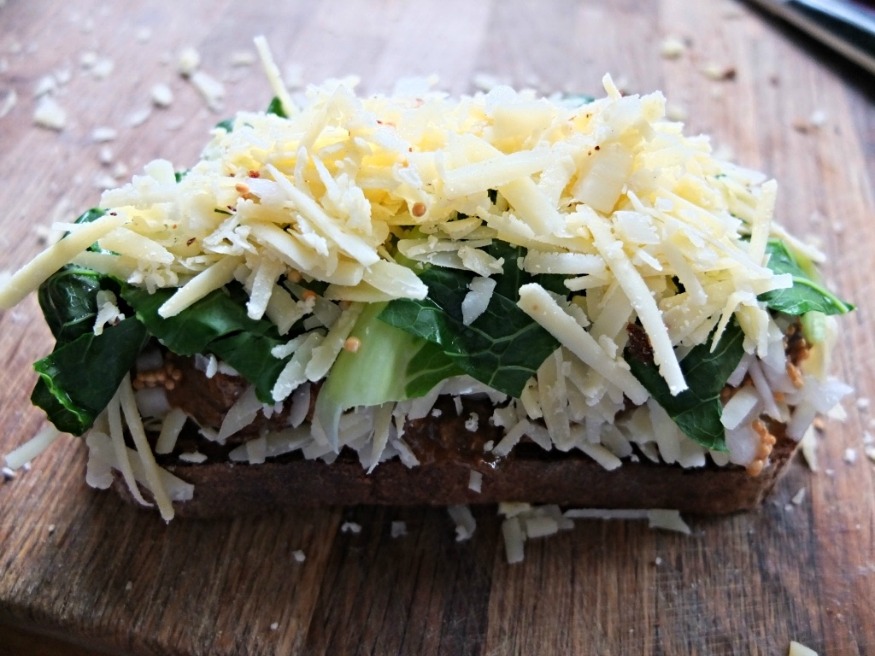
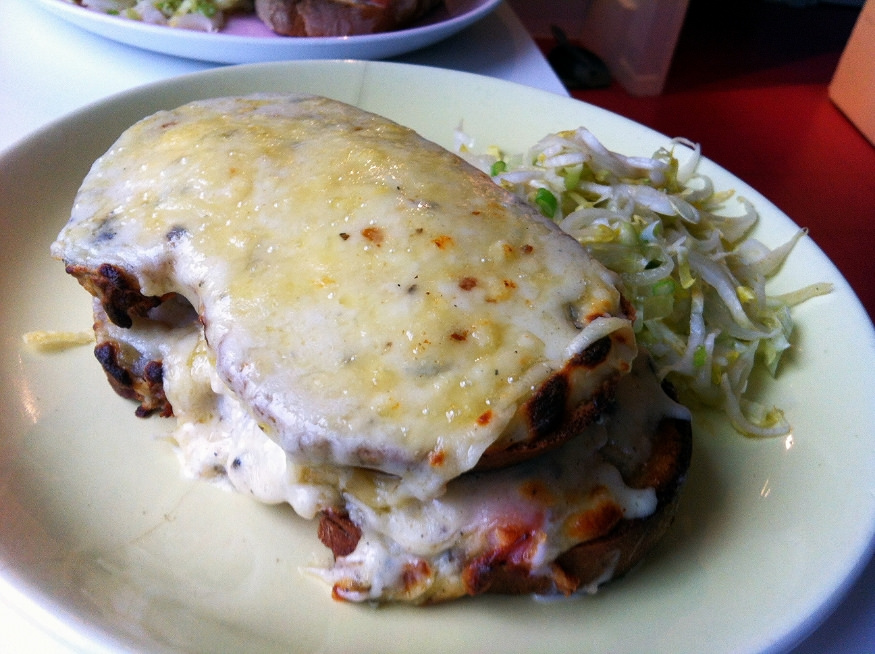
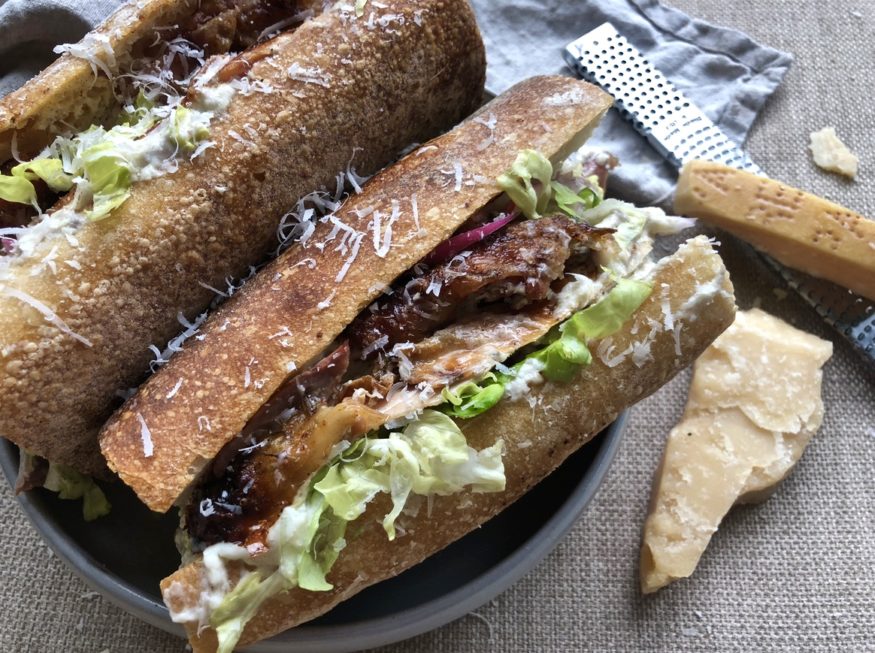
You’ll find plenty on here already, including several banh mi, fish finger, sabich, some excellent toasties and more left-field experiments like 19th Century curry sandwiches and the Fool’s Gold Loaf. This time, I obviously wanted to show off the flavour of Parmesan, and my mind immediately jumped to the idea of updating a modern high street classic: the chicken Caesar.

I swapped chicken with crisp-skinned (so crisp-skinned) barbecued guinea fowl because it has such great flavour and – thanks to the grilling – a lush smokiness. Then it’s all about the dressing. Caesar has huge flavours and they need to be even more so to work with grilled meat in a sandwich. This is essentially a smoosh of cheese, anchovies and garlic made spreadable with yoghurt and mayo and I am entirely happy with that. In fact, I had to keep myself from swiping the lot with my finger before it even made its way onto the bread.

The rich, complex flavour of Parmesan strides boldly to the forefront of this sandwich. We have monks to thank for inventing this hard cheese around 900 years ago – they wanted to make a cheese that could last a long time, which is how they ended up with a distinctive, hard, dry cheese that works so well grated. It is aged for a minimum of 12 months, becoming fully mature at 24 months, and continuing to develop through to 40. The Parm I’ve used for this recipe was aged for 24 months so it had time to develop all the wonderful nuttiness that makes it one of the world’s greats. It brings a lot of umami and richness too, which means the pickled red onions are essential. Don’t skip them.

And I suppose I should also warn you that once you’ve tried this, you’ll never be able to go back to the high street version. Sorry (not sorry).

Guinea Fowl Caesar Baguette Recipe

1 baguette
1 guinea fowl
Crisp lettuce, finely shredded

For the dressing

4 cloves garlic, crushed
Pinch salt
5 anchovy fillets
100g grated Parmigiano Reggiano (the weight after grating)
2 tablespoons olive oil
Juice ½ lemon (but reserve the other half)
3 tablespoons natural yoghurt
2 tablespoons mayo

Quick pickled red onions

1 red onion, sliced
White wine vinegar 150ml
2 teaspoons sugar
1 teaspoon fine salt

Prepare the barbecue for indirect cooking.

Spatchcock the guinea fowl by cutting down either side of the backbone with a sturdy pair of scissors. Remove the backbone then turn the bird over and flatten it out.

Rub with a little oil and season well. Cook offset on the barbecue for around 30 minutes, turning over halfway through.

To make the onions, just mix the sugar, salt and vinegar until dissolved and add the onions. Set aside while the guinea fowl is cooking.

In a pestle and mortar, bash up the garlic with a pinch of salt. Add in the anchovy fillets and mush them up too. Add about half the cheese, mush it up then add the yoghurt and mayo. Stir in the rest of the cheese, plus the oil and lemon juice. Check for seasoning and balance – add more lemon juice or some black pepper if you want it.

Spread the baguette with plenty of dressing, then add lettuce, guinea fowl meat and plenty of pickled onions. Grate a little extra Parmigiano Reggiano on top!

Grilled pork banh mi recipe

If there’s one thing I’ve learnt about bánh mì, it’s that the variations are endless; the bread comes in tiny skinny baguette shapes with just pâté inside, or sometimes in round ‘bap’ shapes. Pickles are not limited to carrot and daikon, and protein not to pork, chicken or fish. I actually saw a version on YouTube stuffed with dumplings. I KNOW. 

Grilled Pork Banh Mi Recipe

Knowing that the fillings are so readily adapted to the whims and fancy of the maker freed me up a little bit to have some fun with this recipe. It had to be grilled because you know I love my barbecue and if there’s one enduring memory I have from Vietnam it’s the scent of pork grilling on the streets. My recipe uses diced pork shoulder, which grills nicely, staying bouncy and tender but also retaining some chew. Important ingredients in the marinade are fish sauce, lemongrass, sesame seeds and… a can of Ting. Yeah, that’s right, this is a South London special. For those of you further afield, Ting is a soft drink that’s popular in the Caribbean (and South London), flavoured with Jamaican grapefruit.

I’ve done quite a classic pickle with carrot and daikon but one time I ran out of radish and used cauliflower stalks and that was good too. Like I said, this should be a free and easy sandwich. I do, however, recommend adding the scotch bonnets to the pickle – the vinegar mellows them and you’re left with the fruity flavour. Another local touch.

Grilled Pork Banh Mi Recipe

Finally, there’s the bread, which is notoriously tricky to replicate at home. These are simply shop bought baguettes, brushed with soy and oil and grilled on the barbecue, as per a regional variation I found out about on Youtube. It’s from Lạng Sơn, apparently, and it’s great because you get that ultra-crackly crust you want from a banh mi and it’s extra savoury from the soy.

There are a lot of myths surrounding the bánh mì and how it’s made (particularly the bread) but if there’s one thing I’ve found out it’s that this sandwich really isn’t as complicated as people think, nor are its ingredients set in stone.

Grilled pork banh mi recipe

Grilled Pork Bánh Mì Recipe

For the marinade

You can marinate the meat the night before if you like but an hour or so is fine with pieces of meat this size, to be honest. You can either skewer the meat or cook it in a cage (the same thing you’d use to cook fish), which is what I do.

1 kg diced pork shoulder

1 can Ting (I guess the nearest substitute would be Lilt)
3 banana shallots
2 stalks lemongrass, hard outer bit removed
2 tablespoons brown sugar
1 tablespoon good sea salt
1/2 tablespoon black pepper
1 teaspoon MSG (optional)
1 tablespoon honey
3 tablespoons fish sauce (Three Crabs is the one I use – you can buy it in Asian supermarkets but obviously use whatever you can get)
1 tablespoon sesame seeds
1/2 tablespoon vegetable or groundnut oil
1 tablespoon regular chilli flakes

For the pickle

2 carrots, cut into batons
Half a daikon, cut into batons
200ml rice vinegar
200ml water
1 scotch bonnet chilli, de-seeded and finely sliced
1 tablespoon salt
1 tablespoon sugar

For the sandwich

4 baguettes
2 tablespoons soy sauce mixed with 2 tablespoons vegetable or groundnut oil
Mayonnaise
Butter
Coriander and mint
Cucumber, cut into long strips
2 spring onions very finely sliced and mixed with just enough olive oil to loosen

To make the marinade, mix all the ingredients together and combine with the pork. To cook the pork, prep a barbecue for direct grilling. When the flames have died down and the coals are covered in white ash, it’s ready.

Get your meat ready in the cage in a single layer (or on skewers) and cook, flipping frequently until just cooked through and caramelised on the outside – around 10 minutes.

Brush the baguettes with the oil and soy mixture and briefly grill until crisp.

Cut the baguettes open and scoop out some of the fluffy insides (room for more filling), then spread one side with butter and one side with mayo – both GENEROUSLY. Don’t skimp, you will ruin the sandwich.

Layer up with cucumber, pickle, the pork, loads of fresh herbs and the spring onion oil on top. Eat – like you mean it.

The Perfect Fish Finger Sandwich Recipe
I am bracing myself for the comeback on this one because everyone (or at least, everyone in the UK) has an opinion on what makes the perfect fish finger sandwich. Does it need ketchup, mayo or fancy pants tartare? Should the bread be toasted or soft? Surely you agree that it must be white. Should the fish fingers be home made or from the beardy man box? These are all important questions.

I had my own views and they were strong but you know what? Every time I made a fish finger sandwich it didn’t quite hit the spot. It didn’t blow my mind and that bothered me because as y’all know I pride myself on my sandwich-making abilities.

The perfect fish finger sandwich recipe

And then it happened. I experienced an education in saucing that led to other improvements and before I knew it there it was, right in my mouth – the perfect fish finger sandwich. What did I change? You won’t believe it, guys. You may want to get one hand ready to clamp your jaw shut because I’m about to tell you that the answer is to use both a mayonnaise-based sauce AND ketchup.

I know. You are reeling. The reason it works is because the ketchup offers something I was always missing in the fish finger sandwich: sweetness. People tend to go OTT on the acidity, I find, adding lemon juice, capers, vinegar et al but let me tell you once more – double-sauce is where it’s at. All credit for this discovery must go my pal and fellow sandwich fancier, Gavin.

This led to a complete re-thinking of all the elements, and no matter which way I tried it, those old orange friends from Bird’s Eye no longer made the grade. I will always love you strange, uniform cod sticks but once I upgraded to these (frankly excellent, say so myself) homemade versions I didn’t look back.

The Perfect Fish Finger Sandwich Recipe

There are many reasons why these fish fingers are so good. Firstly, the fish is salted for half an hour before coating to firm up the texture, so what you get is really satisfying flakes of well-seasoned fish, not mushiness. The crumb is also important and its made from panko and cayenne pepper, so super crisp with just a tiny bit of warmth. We also added a titchy pinch of MSG because we like to live on the edge in this house. That’s totally optional, just as long as you know that being scared of MSG is pointless.

So, there you have it: the perfect fish finger sandwich. There is one problem with it, actually, and that is the fact that it has ruined regular fish finger sandwiches for me, forever. I’ll never be able to enjoy a hastily slapped together hangover special again. Maybe.

The Perfect Fish Finger Sandwich Recipe

This makes 4 sandwiches but is easily cut in half.

270g cod (2 fillets)
270g haddock (2 fillets)
15g Maldon or other good sea salt
120g panko breadcrumbs
2 teaspoons sweet paprika
1 teaspoon ground turmeric
1/2 teaspoon MSG (optional but fun)
Plain flour, for dredging
2 eggs, lightly whisked

8 slices white bread (I use a white loaf from my local bakery, The Hill – you need something soft and white that won’t fall apart too easily but equally you don’t want a hardcore sourdough)
6 tablespoons mayonnaise
4 tablespoons chopped sweet pickled gherkins
Ketchup
Shredded iceberg lettuce
A few drops malt vinegar (optional)

Preheat the oven to 180C.

Cut the fillets in half lengthways (or whichever way works for the shape of your bread).

Coat them with the salt, cover and leave for 30 minutes in the fridge. After this time, wash the salt off the filets and pat dry with paper towel.

Mix the panko, paprika, cayenne and MSG (if using).

Spread one plate with a little flour, put the eggs in a shallow bowl and spread the crumbs on another plate. Dip the fish first into flour, then egg, then crumbs. Arrange on a baking sheet and cook for 20 minutes, turning halfway through.

To assemble each sandwich, spread one piece of bread with ketchup. Mix the mayo and gherkins and spread some on the other piece. Top with lettuce then fish fingers. Close the sandwich and taste. Add a few drops malt vinegar if you feel it needs it.

Cheese toastie with beef cheek, cauliflower leaves and pickled mustard seeds

Many of us need comfort after the events of the past week or, to be more accurate, the past year. Yes, the cheese toastie is a small thing but its cheering potential should not be underestimated; a shit tonne of melted cheese + nostalgia = a force to be reckoned with. I should, as a sandwich fanatic, own an old Breville toastie maker; I often find myself hankering for the old triangular style made with cheap white bread. Instead, I have a snazzy Heston Blumenthal contraption I was sent as a freebie but which I’ve battered through consistent heavy use. It just about works if you hold in a screw and say ‘melted cheese is the one’ three times fast while thinking about pickled onions.

The build. Piling on half the cheese, beef and pickled mustard seeds.

There was something lovely about the simplicity of old school toasties, with their one, maybe two-item fillings. Cheese; ham and cheese; cheese and onion; cheese and tomato. We all know the dangers of hot tomato as part of the learning curve; many a child went to school with a tomato-shaped blister on their chin. Beans were also high risk. There was egg if you were being fancy (tricky to pull off).

Add blanched cauliflower leaves and more cheese.

This style of toastie is still popular in pubs in Ireland, at least in Dublin, where lots will do a ‘toasted special’ – a very basic toastie which I’ve seen cooked in a normal toaster turned on its side while I waited for my pint of Guinness to settle. Cheap white bread, weird canary yellow cheese, too-thick onion. Lovely.

Toasties now are a different thing entirely – a street food trend, people’s livelihoods. We buy them from air stream trucks and restaurants for anything between £5 – £10. They contain multiple varieties of cheese (for the right balance of flavour vs. stringiness) and there are additions, like slow cooked short rib; haggis; onion and herbs; chorizo; macaroni; roast broccoli; pickles; you name it, they toast it.

I rather enjoy the way toasties have evolved, even though it took me a week to make this one. Why? Life. I forgot to buy ingredients, then I didn’t have time to slow cook the meat, then Trump… nope, still can’t deal with it.

Cheese toastie with beef cheek, cauliflower leaves and pickled mustard seeds.

So this is a thoroughly modern toastie. There is beef cheek which has been cooked slowly in a sauce given depth with red miso. There are cauliflower leaves because right now I’m enjoying them more than the florets, and there is a poky mixture of pickled mustard seeds and onion to offset the cheese. About that: it’s Isle of Mull Cheddar and Marechal. A good combination for flavour + requisite stringiness. It’s a very full-on experience, a world away from the simple toasties of childhood. The thing is, I have a lot more to worry about now. I need a comfort toastie to match.

Cheese Toastie with Beef Cheek, Cauliflower Leaves and Pickled Mustard Seeds

We made the beef stew in a pressure cooker to save time (it had been a week, after all). I use an Instant Pot in case you’re interested. The method as a whole is actually a little ridiculous now I look back over it but hey this is what we did. It tastes fantastic.

For the stock and beef cheek

1 onion, diced
500g beef cheek
2 tablespoons plain flour
2 tablespoons red miso

For the stock

Beef bones (get some from your butcher, they’ll give you enough for stock)
2 onions, roughly chopped into a few pieces
3 bay leaves
10 peppercorns
Parsley stalks

Put the beef bones in a roasting tin and roast for 30 mins at 220C (not fan assisted). Remove from the tray (keep the pan with the drippings) and put in a stockpot, cover with water and add the roughly chopped onions, peppercorns, parsley stalks and bay leaves. Bring to the boil then simmer for a couple of hours, 3 or 4 if you have time, occasionally skimming off the scummy bits that rise to the top. Strain and reduce the stock by half.

Warm the pan with the drippings and stir in the flour, mixing well for 2-3 minutes. Add a good splash of stock to loosen everything, set aside.

Dice the beef cheeks then sear them in a little oil. Set aside. Brown the diced onion until soft and starting to colour, set aside. Add a splash of red wine, scraping up the bits from the bottom of the pan. Add back the meat, gravy (from the roasting tin) and top up with the stock. Cook for 30 minutes then release the pressure quickly. Add the onions and cook for another 15 minutes. Remove the meat, reduce the sauce a little, add back meat and the miso. Season.

It’s best if you now leave it overnight. The meat mixture goes thick and jellified and is easier to work with.

For the sandwiches

Slightly stale sourdough
Cauliflower leaves (these are best if you go either high or low end. So, caulis from a farmers’ market or a supermarket basics range will have the most leaves)
Large handful cheddar, small handful Marechal per sandwich
1 tablespoon mustard seeds mixed with 1/2 finely diced onion, 1 tablespoon sugar, 2 tablespoons white wine vingegar for 10 mins
Butter

Butter the outside of the bread. Blanche the cauli leaves. Layer up sandwiches with half cheese, beef, cauli leaves, pickles, more cheese. Toast in a sandwich toaster, or you could use a hot pan (weigh the sandwich down with something heavy, fry in butter).

Cheese and Kimchi Toasties

I never thought I’d be posting a squash recipe here, let alone a squash soup. I used to loathe the pappy sweetness of most orange-fleshed gourds, and they’re like pure baby food when whizzed into a soup; I’ve still got teeth. In recent years however I’ve come around to certain preparations of butternut squash, in particular those which steer away from that pumpkin-pie-cinnamon-spice-thanksgiving vibe. Miso does this job very well indeed, its yeasty funk bringing some complexity.

A toasted cheese sandwich is hardly a groundbreaking accompaniment to soup but it is more exciting with the addition of kimchi, especially a really punchy one. I used up the ends of a cheeseboard in the sandwich but it was mostly Lancashire, which has some sharpness. That’s one gnarly end of ageing cheese and a double whack of fermentation before 1pm on a Wednesday. Not bad going.

Squash and Miso Soup with Kimchi Cheese Toasties

Squash & Miso Soup with Cheese & Kimchi Toasties

If you do dig the sweetness of squash then you could enhance that in this soup by roasting it first and adding it later.

1 kg butternut squash, peeled, seeds removed and cubed
1 large potato (around 400g), peeled and cubed. You could use sweet potato too.
1 onion, finely chopped
2 large cloves garlic, crushed
1 thumb of ginger, peeled and grated or crushed (I do all mine on a microplane these days)
3-4 tablespoons white miso (or yellow)
1.5 litres good quality vegetable stock
Oil for frying (vegetable or groundnut/peanut)
Shichimi Togarashi (Japanese seven spice) to garnish (optional)

Heat a tablespoon of oil in a large pan (large enough to cook the soup in) and gently cook the onion until soft but not coloured, then add the garlic and ginger and cook for a minute or so, taking care not to burn it. Add the miso and stock and stir until the miso is dissolved. Add the squash and potato and simmer gently until soft. Blend the soup – this is easiest with a stick blender.

Taste and season. Serve topped with a sprinkle of shichimi and the cheese toastie.

For the toastie

Two slices sourdough bread
Kimchi
Cheese (any melter will do here, but you want something with strong flavour, like good Cheddar or Lancashire)
Butter or mayonnaise

Do I really need to tell you how to do this? Okay. You can either butter the outside of your bread or spread it with mayonnaise, both work well (as mayonnaise is really just oil). If you have a toastie machine, as I do, then it’s a case of filling the sandwich and then putting it (butter or mayo-ed side down) into the machine. If you don’t, then fry the sandwich in butter, weighing it down with something heavy, then flipping over and repeating until golden on both sides.

Why are seasonal sandwiches so rubbish? Last year, on a whim, I did a mad dash around Holborn collecting all the Christmas sandwiches from the major high street chains for a seasonal sandwich show down and it was just so depressing, I didn’t bother to repeat the experience this year. It got me thinking though, what exactly is it that’s so bad about most of them?

The main problem is the fact that they are generally stuffed with as many different elements of the Christmas dinner as possible. Why? The overall effect is a sandwich with a horrible generic taste that is unique to the time of year but not very pleasant. This is a sharp contrast to the sandwich made from your ACTUAL leftover Christmas dinner which is always truly bloody lovely, the reason being that it is made from nice ingredients that have been recently and properly cooked, which brings me nicely to my next point…

The ingredients in pre-prepped Christmas sandwiches are generally a bit gross. Who really eats turkey that often? More to the point though, who eats cheaply produced turkey that smells like farts and squeaks against your teeth? Who eats bacon that has been infused with a fake smoke flavour instead of actually smoked? Who eats sickly lurid red cranberry sauce that looks like it should be used to get really ingrained dirt off builders’ hands? PEOPLE WHO EAT CHRISTMAS SANDWICHES.

So anyway I thought I should have a bash at making a seasonal sandwich that actually tastes nice. It’s on sour dough, because there’s a lot of filling, and it needs to have some good sturdy scaffolding around the outside. Next, a layer of shredded sprouts, which I fried a little to get some colour on them, followed by a layer of proper, treacle cured, smoked bacon. I would have preferred streaky but smoked back I had so smoked back I used. The bacon is chopped before going into the sandwich, so it doesn’t come out in one long annoying strip when you try to eat it. Some good sharp cheddar next (I used Keen’s) followed by a layer of caramelised onions, which, despite being a bit 2001, bring much needed sweetness to the sandwich. A slick of wholegrain mustard and then, on the side, a pot of gravy (more of a stock really), made with partridge carcasses.

So it’s essentially a sort of festive toasted cheese sandwich French dip. Further proof that the toasted cheese is a sandwich which fits seamlessly into pretty much any situation.

Christmas Toasted Cheese Sandwich with Partridge Gravy

(this served 2. I know, I’ve changed)

2 slices sourdough bread
Several thick slices good quality cheddar cheese
1 onion, cut in half and sliced
A handful sprouts, finely sliced
3 slices back or 4 slices streaky smoked bacon (again, good quality)
Wholegrain mustard
Butter, for frying

For the gravy (you could of course use other bones or stock)

4 partridge carcasses
1 onion, halved
1 large carrot, roughly chopped
2 sticks celery, roughly chopped
A handful parsley stalks
A few peppercorns
Salt

To make the gravy, roast the carcasses and vegetables in a hot oven for about 30 minutes. Add to a stock pot with the other ingredients and cover with water. Simmer for a couple of hours. Skim off any scum from the surface. Strain and reduce a little further if desired.

For the sandwich, first caramelise in the onions very slowly, in butter. Stir them often but keep on the lowest heat. They will take about an hour. A splash of booze wouldn’t go amiss here come to think of it. Don’t forget to season them. In a frying pan, fry the sliced sprouts in a little oil over a fairly high heat, stirring all the time, until beginning to colour. When ready to assemble the sandwich, grill the bacon until the fat is crisp. On one piece of bread, add a layer of onions. Roughy chop the bacon and add it on top. Follow with a layer of the cheese, and then the sprouts. Cover the other piece of bread with mustard and put it on top.

In a heavy based frying pan or skillet, melt a generous amount of butter and add the sandwich. You don’t want the heat too high or it will burn but it should be sizzling. Take a heavy object (I used a Le Creuset pan and plonk it on top to weigh it down). After a couple of minutes (keep an eye on it), flip it over to toast the other side.

The structure of the sandwich is of utmost importance. As I have said during many an interview on the subject, there is nothing, NOTHING, worse, than the corner of a sandwich gone soggy as a result of seeping tomato juice; that’s just an amateur build, right there. Everyone knows you don’t put that tomato next to the bread, you put it underneath a protective barrier, such as lettuce. Unless of course, it is a tomato sandwich, in which case lettuce should be nowhere near it and you should simply be eating that sandwich immediately.

Another example is the construction of a burger. A burger with chillies and cheese. Think about the layering; what you don’t want to be doing is putting the cheese directly onto the meat and then attempting to settle the chillies on top; they will tumble out of the burger and onto your plate. Or your lap. The chillies should be placed directly onto the meat, and then sealed with the layer of cheese, creating a spicy pocket and preventing any loss of fillings.

The sandwich I’m going to tell you about in a moment contains caramelised onions, which have been cooked down in very concentrated beef stock and bourbon. Now if they were on a burger (which they bloody well shouldn’t be because that would be horrible and wrong), then they would need sealing on top of the meat with the cheese as per chillies. In the case of my cheesy creation however, it was only appropriate to smear them directly on the bread. Why? I don’t know. Such is the complexity of the sandwich build. Part rule abiding, part instinct.

The sandwich is made with Gruyère, steak and sticky onions, in a muffin. I ended up making this as a sort of homage to another food blogger – I’m not going to mention any names – who basically makes dishes ‘with all the flavours of’ other, existing dishes, ‘spaghetti bolognaise tacos’ for example, or  ‘fish and chips pizza’ (I may have made those up). Me and a few of my mates are addicted to this blog, and to laughing (affectionately) at the latest recipe. So this is a sandwich with – wait for it – ‘all the flavours of’ French onion soup. The onions, the beef stock, the onions, the cheese, the onions. It’s hella tasty I have to say. And extremely rich. I wouldn’t attempt it with anything bigger than a muffin, you’d probably be sick.

French Onion Soup Muffins Recipe

2 English muffins Gruyere cheese, grated 2 onions, sliced Beef stock, preferably home made Bourbon 4 thick slices good quality steak (I used sirloin) Butter

Melt a good lump of butter in a pan and let the onions caramelise very slowly in it. This should take about an hour. When they are nicely golden and soft, splash in an inch or so of beef stock and a splash of bourbon. Let this cook out until there is barely any liquid left.

In a hot frying pan or skillet, quickly sear the beef slices on either side for mere seconds, then let rest while you build the sandwich. In the same pan, toast the split muffins briefly. Preheat a grill, then spread each muffin with onions, on the top and bottom halves, and add a layer of cheese over each layer of onions. Wang this under the grill until the cheese is nicely melted. Remove and divide the steak slices between the sandwiches. Put the two halves together and off you go. Lovely with a beer.

For more on the structure and contents of sandwiches, buy my book! 101 Sandwiches is a collection of the finest sandwiches from around the world. 

I’m patting myself on the back as I write this. It’s hard typing with one hand actually. Modest, huh? The truth is, this sandwich ended up being so brilliant because it was a joint effort between three people and don’t worry, comrades! You won’t go unacknowledged! It started because my boyfriend and I couldn’t stop thinking about the lobster roll at Burger and Lobster. I think about it A LOT. We don’t have time to go, though, you know what I mean? What with him opening a restaurant and me, with, well my own irons in the fire.

Managed to find time to buy lobsters though, didn’t we? Huh. Two live lobbys ready for the pot. They went into the freezer as per RSPCA instructions but when they came out were still pretty frisky. This, coupled with the fact they were too big for the pot but were already halfway in by the time we realised made for a rather traumatic experience; that’s me running the length of the flat with my t shirt pulled up over my face screaming ‘No no no no no no no no no!’ while someone else dealt with the situation in a calm and reasonable manner. Another irritating upshot of this kerfuffle was that we didn’t notice the roe on the tail of the female lobster. An obscene amount of roe in fact. The fishermen are supposed to throw these laden lobbys back but had obviously not noticed either, so we ended up cooking the roe. A shame.

Sorry dude…

Anyway that roe was definitely going into the mayo for extra lobster flavour regardless…but hang on a minute, we are definitely not done with this mayo just yet. Enter, the bisque. We cooked the shells down with a little onion and celery, reducing it good and proper until it was mega intense. The resulting roe + bisque enhanced mayo? I did a little dance. Once mixed with the meat this was the most lobstery-tasting lobster mixture I have ever had the pleasure of lobstering. I’ve taken advice on a method for perfectly cooking lobsters, too, which is to boil them in the pot for 3 minutes, then turn the heat off and leave them in there, lid on, for 7. Absolutely spot on.

I wanted brioche rolls but they were too hard to find in SE London and I sure as hell wasn’t making my own on a weeknight so we improvised with a loaf of white bread. We buttered it, heavily, before toasting it in a skillet on both sides.

This is the best lobster sandwich I have ever eaten. The triple lobster flavoured mixture is the absolute nuts. She may not have the looks but boy, she’s got the taste.

Ultimate Lobster Sandwich Recipe

(serves 2-4, depending on size of lobsters and level of greed)

2 lobsters
2 egg yolks
Vegetable oil, for making mayonnaise
1/2 teaspon Dijon mustard
Juice of 1/2 lemon
1 stick celery, finely chopped
1/2 small onion, finely chopped
4 slices of the kind of white bread described above
Butter (I used the kind with salt crystals in it)
Chives, to garnish

For the lobsters:

Put your lobsters in the freezer for 2 hours before you want to cook them. You don’t have to do this, and the evidence for them actually feeling any pain is inconclusive so hey, up to you.

Cook the lobsters by bringing two large pans of boiling water to the boil (or one massive one if you have it). Plunge them in and cover with lids. Cook for three minutes then turn the heat off and leave for 7 minutes longer. Remove them and set aside to cool.

When cool, extract the meat. I did this using a hammer, nutcracker and er, a chopstick. You may have the correct implements. I won’t go into detail here about how to get the meat out as we’ll end up with an essay – there are plenty of guides online if you Google it (I recently came across this brilliant video showing you how to get all the meat out of a lobster – check out the trick with the legs! http://lifehacker.com/the-best-way-to-get-all-the-meat-out-of-a-lobster-483432288). Reserve the shell bits.

For the bisque:

Put all shells into a large clean pan with a splash of vegetable oil plus the finely chopped celery and onion. Fry this for a bit, stirring occasionally. Add about a litre of water. Bring to the boil, then reduce to a simmer for half an hour. Strain and then reduce the strained liquid again, until intense and kick ass tasty. You don’t want much left as you’ll be adding it to the mayo. Consider it an intense little flavour bomb.

For the mayo:

Put the egg yolks in a clean bowl and whisk them together with the Dijon mustard. Whisk in the oil, adding a few drops at a time and making sure each bit of oil is fully incorporated before adding the next. As you whisk in more oil and the mayo starts to thicken, you can start adding it in very slightly larger quantities until you are steadily adding it in a thin stream. Do this is an electric mixer to save muscle pain/hassle. Add the bisque and lemon juice. Obviously if you are lucky enough to get roe than add it but chances are, you won’t. Whisk again and season with salt and pepper. You might want to thicken it slightly if it’s too thin at this point.

For the bread:

Cut and butter liberally. I mean LIBERALLY. Heat a skillet (or similar) and toast on both sides until golden brown (not too much).

Assembly:

Chop the lobster meat roughly (not too small, you want nice big chunks). Mix a little of the mayo with the lobster – do this a little at a time – you don’t want too much. Pile it onto the bread. Garnish with snipped chives. Seal with other piece of bread. REJOICE.

It’s National Sandwich week, so obviously I’m all over that like ketchup on a chip butty. Or brown sauce if you’re, you know, NORMAL.

Anyway it seemed only right to honour the week with some sandwich bits and bobs so today I give you a recipe for what is a frankly outrageous piece of work – The Fool’s Gold Loaf. Made famous by Elvis ‘The King’ Presley, and taking its name from the reportedly stupendous price tag of $49.95. The story goes that Elvis would travel miles to eat this sandwich at the restaurant where it was invented, a joint called ‘The Colorado Mine Company’, in Denver. It’s said in fact that Elvis once flew his guests in from Memphis on his private jet just so they could eat it.

In true Elvis style this sandwich is a vision of excess – an entire loaf, hollowed out and filled with a jar (yes a jar) of peanut butter, followed by a jar (yes a jar) of grape jam, followed by a substantial amount (you get the idea) of crisp grilled bacon.

The combinations may sound odd, but the mixture of salty and sweet flavours isn’t that far out there; think bacon and maple syrup on waffles, or salted caramel ice cream. That said, I’ve never known a sandwich to elicit such a wide range of noises from people when eaten – a mixture of ‘mmm this is tasty’ plus ‘wow, this is wrong’ but ‘mmm this is tasty’; once you’ve had one bite, it’s  difficult to resist taking another.

This sandwich serves one, if you’ve the appetite of Elvis. It will serve approximately 8 ‘normal’ people however. Uh-huh.

Fool’s Gold Loaf

1 x approximately 11 x 4” white loaf
450g streaky bacon
250g smooth peanut butter
250g grape, blackcurrant, blueberry or plum jam
Butter, for spreading on the loaf

Preheat the oven to 150C.

Cut the loaf in half lengthways, leaving a little more thickness to the bottom half. Remove most of the crumb from the inside of each half, leaving a thickness of a couple of centimetres (or as much as you like). Spread each half with butter, inside and out.

Place the two halves on a baking tray and bake until toasted and lightly golden all
over (approx. 15 minutes).

While the bread is toasting, grill the bacon until crisp.

Spread the bottom half of the loaf with the peanut butter, then layer on the bacon. Spread the top half with the jam and sandwich together. Cut into slices to serve.

Croque Monsieur

Finding the perfect croque monsieur became a bit of an obsession for me and @donalde for a while, to the point where we had a shared spreadsheet filled with croque locations and notes. We never found a really good one, even in France. The worst I’ve ever eaten though was at The Delaunay; it finished me off and the mission went swiftly on the back burner.

Then one day I find myself snuffling my nose around a bag of Italian truffles and getting very excited at the suggestion we might make a TRUFFLED SUPER CROQUE.

They’re a bit different, these truffs. Known as Bagnoli, or tar truffle, they’re a lot cheaper than the more famous ones (buy them here), and they also need a bit of cooking. Raw, they have a kind of petroleum scent that seems like it should really be getting you high; like if you ate a whole one you’d be tripping your tits off for DAYS. When cooked however, this mellows and they taste a lot more, well, truffly.

So the stages of croque construction worked like this: a slice of really fantastic sourdough, from Wild Caper in Brixton Market (some of the best carbs in London), which has the ability to absorb the sauce while still maintaining some self respect; a softer white loaf wouldn’t be able to handle such an oozy monster. Then, a butter flavoured with rosemary, garlic and Halen Mon smoked salt (HUBBA), followed by ham, a mixture of grated Gruyère and truffle, the other slice of bread, then an obscene wobbly blanket of thick bechamel, again infused with truffle, plus onion, bay and peppercorns. Oh yeah and then a bit more cheese on top. In for a penny and all that…

Holy SHIT. Ho. Lee. Shiiiiiiit. The best croque ever. Croquing amazing. Top. Of. The. Croques.

Afterwards I had to lie beached on the living room floor moaning ‘this is so uncomfortable’ whilst simultaneously being unable to get up and thinking constantly about the bite left in the kitchen that I’d not been able to manage. How could I let that happen? Could I not have dug deeper? Well, no, because I’d hate to sully the memory of such a perfect croque, particularly one that was such a long time coming.

We served it with a salad of endive and spring onion, sharply dressed, which is essential. Do not attempt to consume this sandwich without aforementioned counterpoint.

Croque Monsieur


Ultimate Croque Monsieur

Sourdough white bread
Ham
Gruyere cheese – shitloads
1 Bagnoli truffle, or some regular truffle if you’re loaded
Butter flavoured with garlic (which has been blanched in boiling water for 2 minutes), chopped rosemary and smoked salt

For the bechamel

40g butter
20g flour
425ml milk
A little of the truffle, grated
A few peppercorns
2 bay leaves
A slice of onion

Heat the milk gently with the truffle, peppercorns, bay leaves and onion. When it reaches simmering point, take it off the heat and strain into a bowl.

Melt butter and then mix in the flour, stirring vigorously to make a smooth paste. Start by adding the milk slowly, mixing all the time. When about half of it is in, start adding it in larger quantities. The sauce should be smooth and glossy. Let it cook out gently for about 5 minutes, then remove from the heat and season.

To make the sandwiches

Start by toasting the bread lightly. Spread with the flavoured butter, then add a layer of ham, then mix a load of grated cheese with grated truffle and spread that on, thickly. Then add the other slice of bread and top with loads of the bechamel sauce. Add a little cheese on top if you want to be really rock and roll. Place under a low grill until the whole thing starts to melt. It’s good to do this slowly as you want to make sure that the inside is melted. When it’s going nicely, turn up the grill a bit to get the top all nice and bubbly.

Eat with a sharply dressed salad, then have a lie down.


Meatball Sub

The other day I caught the episode of Friends with Joey’s sandwich – the one where a car backfires but Joey, Ross and Chandler think it’s a gunshot and Joey appears to dive across Ross in order to protect him from the bullet. Chandler is consumed with jealousy and hurt that Joey didn’t try to save him over Ross, but it later transpires that he was in fact diving to protect his precious meatball sub.

The very thought of this fictional sandwich gave me the mother of all cravings. Meatballs? Good. Marinara sauce? Good. Cheese? Gooood. I immediately started planning Project Meatball Sub.

I became a little obsessed with creating a ‘proper’ marinara and found that the Italians, unsurprisingly, have very strong opinions about what should and shouldn’t go in. I knew that I wanted a rich and unctuous sauce that was slightly sweet, but the latter requirement is the source of much controversy. Some say sweetness should only be achieved by using the most perfectly ripe tomatoes, which, frankly, would pretty much rule out ever making one in this country, even in the height of summer. Tinned tomatoes were the obvious substitute but short of spending £3 on a really good quality can (or two), I was tempted to add sugar. This, it turns out, is not acceptable. Some argue that one should only ever add a cube of potato to absorb excess acidity, while others champion the sweetness of celery. Me, I cheated and used a good pinch of plain old sugar. Sorry (lies, lies).

For the meatballs, I used a mixture of half beef and half pork because I think it gives the best flavour. Breadcrumbs soaked in milk kept them nice and light, crucially important if I was to stand any chance of making a dent in such a hefty ‘wich. For the cheese, I chose Gruyère, as it’s a great melter and has a good strong, nutty flavour; I really wanted to taste the cheese in this sandwich. To counteract all that fatty richness, a topping of charred, bittersweet green pepper. Usually I can’t stand green peppers but their bite works really well here – in fact I would say they’re essential.

This is probably one of the unhealthiest sandwiches I’ve ever made, and that’s really saying something. It’s also the reason it tastes so damn good, let’s face it.

Meatball Subs

(makes 4) (the meatballs and sauce would also be fantastic with spaghetti)

For the meatballs

250g minced pork
250g minced beef
1 thick slice white bread, crusts removed
A few tablespoons milk
2 tablespoons finely chopped parsley
4 tablespoons grated Parmesan
1 small onion, very finely chopped
Flour, for dusting
Oil, for frying

Put the bread in a small bowl and cover with the milk, allowing it to soak in, then mash to a paste with a fork. Mix the paste with all the other ingredients. Make small meatballs with the mixture, then set aside to refrigerate for half an hour at least.

When ready to cook, cover a plate with flour, then roll each meatball around in it. Fry the meatballs in oil until brown all over, then set aside to drain on kitchen paper. They don’t need to be cooked fully as they will be simmered in the sauce later.

For the sauce

2 tins chopped tomatoes
A splash of red wine
4 cloves garlic, finely chopped
A good pinch of chilli flakes
A pinch of sugar
1 bay leaf, torn
A splash of water or stock
1 small bunch fresh basil, shredded

Heat a couple of tablespoons of oil in a pan and gently fry the garlic and chilli flakes until the garlic just begins to colour. Add the wine and let it bubble up for a minute or so. Add the tomatoes, sugar, bay leaf, water/stock and some salt and pepper. Bring to the boil, then add the meatballs. Let the mixture simmer for about 30-40 minutes, or until the sauce is rich and thick. Add the fresh basil.

For the roast veg

1 green pepper
1 regular onion

Slice the veg into wedges, place in a roasting tin, season with salt and pepper and drizzle with oil. Mix well. Cook at 200C until soft and charred in places (about 30 mins).

For the subs

Recipe here. You could of course buy some ready-made.

To assemble the subs

You will need Gruyere cheese or another cheese which melts well, to top the subs.

Slice the subs, then scoop out some of the crumb from the bottom half so you can fit the meatballs in more easily. Lightly toast the bottom half of each sub. Top with some of the meatballs, then some of the cheese and place back under the grill so that the cheese melts. Toast the top half of each bun also. Top each sub with roast pepper and onions, then the top half of the sub.

Make sure you do some serious exercise the next day.

ENJOY!

Po Boy

I have a major soft spot for classic American sandwiches (no surprises there) and recently I’ve been focused on tracking down one of the all time greats – the po’ boy – in London. It’s been a fruitless endeavour, a particular low point being my recent experience at The Diner, in Soho. I left feeling queasy, cheated and strongly convinced I should try making one at home. A

A po’ boy, in case you’re not familiar, is a sandwich originating from Louisiana, so called because it was once the staple food of labourers – the poor boys. There are many variations but the most common fillings seem to be roast beef, fried shrimp or fried oysters. A ‘dressed’ po’ boy (like this one) comes loaded with lettuce, tomato, a piquant mayo, pickles, onion and hot sauce. Gimme.

As always when one delves into these things, I found that the question of what makes an authentic po’ boy is a sensitive one. The bread should, apparently, be a New Orleans French style baguette but I had a lot of trouble finding a good-looking recipe and there seems to be controversy around the idea of the perfect crust and interior texture. Some argue that it’s impossible for home cooks to ever replicate an authentic New Orleans bread outside the area, as it’s the high humidity and unique climate in general (partly below sea level) that make the bread just so, while others say it’s the unique properties of the water. It was at this point I gave up (I’m sure you understand) and decided that a nice soft sub roll wouldn’t be the end of the world and in fact would work nicely against the crunch of fried prawns. After a failed attempt with a duff recipe, I played around and came up with a roll I was happy with – soft and sweet with a decent sturdy crust.

I bought some fat, fresh prawns and seasoned them with a mixture of polenta/cornmeal (no sweet ‘n sour chicken ball-esque batter this time, The Diner) and a fantastic New Orleans spice blend I was sent by Richard Myers, a Louisiana native. It’s a mixture of Red Sea salt; garlic; onion; spices, including paprika; white, black and red peppers; citrus; thyme; oregano and rosemary. Phew. It’s incredibly intense and seriously tasty.

I loaded the subs with a bed of shredded lettuce followed by the crisp, spicy fried prawns and plenty of  home-made mayo mixed with chopped pickles, onion, mustard and parsley, thinned and soured with pickle juice and lemon. As per the videos of famous po’ boy vendors I watched on YouTube, I finished the sandwich with an extra splash of hot sauce. Wow. The Americans really have invented some incredible sandwiches. This was a world apart from that grim recreation I suffered weeks earlier; it winds me up, the way people take a beautiful idea and make it as cheaply and with as little love as possible. I’ve never been to Louisiana, and this recipe may not be entirely authentic, but I can promise you that it was made, and eaten, with a Whole Lotta Love.

Shrimp Po’ Boys

For the subs (makes 4)

1 packet fast action dried yeast
20g caster sugar
225ml warm water
25 butter, melted and cooled
1 teaspoon salt
375g plain flour
1 egg white
Sesame seeds

Dissolve the sugar in the water, add the yeast and leave to activate. Melt the butter and allow to cool almost completely. In the mixing bowl of an electric mixer with a dough hook (or of course you could mix by hand), combine the flour, yeast mixture, butter and salt.

Knead really well, then cover with cling film and allow to rise until doubled in size. After this time, lightly dust 2 greased baking trays with polenta/cornmeal then split the dough into four and shape into long sub-shapes. Slash each several times with a knife, brush over egg white then sprinkle with sesame seeds. Let double in size again.

Bake at 200C for about 18-20 minutes or until golden brown all over.

For the prawns

6 raw king prawns per person, shelled and de-veined
Polenta/cornmeal
New Orleans seasoning, available from Richard Myers (e-mail to purchase)
Beaten egg

Spread a plate with a mixture of 3 tablespoons polenta to 2 scant tablespoons New Orleans seasoning. Dip each prawn in the egg, followed by the seasoning mix.

Deep fry the prawns for 2-4 minutes, depending on size. You can also shallow fry them, but make sure you have a couple of cm of oil in the pan and turn them over halfway through. Drain on kitchen paper.

For the mayo

2 egg yolks
Oil (vegetable or groundnut are both good but don’t use olive oil, certainly not extra virgin)
2 chopped sweet dill pickles
1 teaspoon American mustard
1/2 finely chopped red onion
Juice of 1/2- 1 whole lemon
1 teaspoon juice from the pickle jar
Chopped parsley
Salt and pepper

Put the egg yolks in a clean bowl and whisk them together. Whisk in the oil, adding a few drops at a time and making sure each bit of oil is fully incorporated before adding the next. As you whisk in more oil and the mayo starts to thicken, you can start adding it in very slightly larger quantities until you are steadily adding it in a thin stream. The key with mayo is to be cautious with the oil until you get a feel for making it. If you add too much at once, it will split. If this happens, don’t despair. Take a fresh egg yolk in a clean bowl and begin adding the split mixture into it, very slowly, just as if it were the oil. This should bring it back.

Add all the other ingredients, adjusting to taste (e.g. you may want a little more lemon juice, a little more salt)

To dress the po’ boy

Split and toast the sub, then load with shredded lettuce (I used little gem), the prawns, the mayo and a dribble of (mild) hot sauce. It’s traditional to use tomatoes I believe, but I just couldn’t face it when there was snow on the ground. DEVOUR!